How to Paint a GIANT Letter on Your Wall
A few weeks ago I went to visit Becky from Organizing Made Fun. We had been trying to find an excuse to get together and finally a project came along that we couldn’t resist. She was going to redo her potting shed and she desperately needed my help!
Alright, alright. Maybe it wasn’t really that desperate since her husband, John, did most of the heavy labor.
Alright fine. He did all of the heavy labor. But Becky and I definitely spent at least 1.5 days doing little things to fix up the shed and I think it turned out great…if I do say so myself.
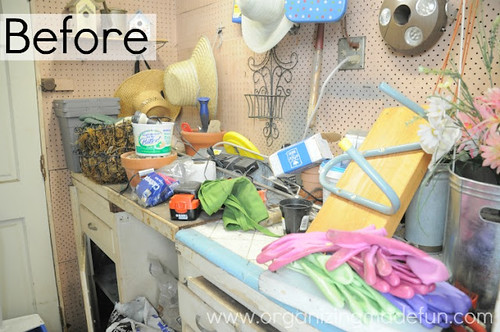
Before I got there Becky and John had done a TON of work on the shed. This is what it looked like before she ever started the project.
And by the time I got there it looked like this:

While John finished the plank walls (which are amazing and now I want to do the same thing in my workshop) Becky and I planned out the rest of the decor. We wanted to use mostly paint for the project and plus it is just a shed after all. We haven’t lost all sense of perspective.
She wanted pegboard over the potting bench (that she made with cabinets from the Restore and an old door for the countertop). We decided to paint it black so it would contrast nicely with the gorgeous color of the cabinet. John cut out the pegboard for us. What a guy!

Becky chose her colors using Sherwin Williams Chip It! program and it turned out great.
We wanted a nice POP to finish the shed with style. We decided that a giant letter over the counter would do the trick. It would be simple, paintable and playful. While she went to work on other details, I tackled the job of painting a giant “B” onto the pegboard.
I found a nice font on my computer and made a huge “B” in my word processor. Then I took a picture of it with my phone and used that as my guide. It may have been the long way to do it, but it worked fine.

All I needed was the picture, the paint, a straight edge and some soft, small paint brushes. I like the kind that’s really flat and a bit wide for this type of job.
I studied the “B” on my phone and kind of sort of (this is obviously going to get very technical) figured out the ratios. Where was the halfway point? How much wider is it than tall? How much more does the lower bump stick out from the upper bump?
(So now Becky, you know that when I looked like I was just sitting under a tree in your backyard accomplishing nothing I was really doing math calculations in my head)
In this case, in my phone the B is 2″ tall and believe it or not it’s almost 2″ wide also if you measure from the serif to the very edge of the big bump. I knew I wanted the letter to be almost as tall as the board, so I measured and made marks…one in each corner as if it were a square shaped letter instead of rounded on one side.
Next I figured out the size I wanted my serifs (in this case 4″) and I moved my straight edge over that amount and drew my first line for the letter on the board.

Don’t you love the pencil Becky gave me to work with? I haven’t gotten to use a star shaped eraser since the 4th grade.
I just kept doing the cyphering and drawing lines until I had my boundaries for the letter. Here’s a sample of how I decided where to draw my lines.

Then, with the fancy star pencil I started to sketch the “B”. At first I just drew the straight lines. Then I started to connect them with curves. Believe me, it took a lot of trial and error to get them just the way I wanted. I paid attention to the sample on my phone and noticed there were little curves where the bumps connect to the straight side. So I gently curved them in. If you’re not confident that you can make the curves consistent from one spot to another you can use a curves object, like a plate, to get them even.
There were pencil marks all over the place but that’s OK. I’d draw and re-draw the lines until I had it just the way I wanted it. Take your time. It’s not every day you paint a 3′ letter.

I just ignored the peg holes and treated it like it was a solid surface.
Once the outline was ready, I grabbed a flat brush and a can of the paint left from Becky’s cabinets and I started going very slowly around the inside edge of the whole thing. Do the outline first.

Then just fill in between with big, easy strokes. I didn’t try to completely cover the black with paint. I let a little peek through. Because it’s so big, I did the bottom half first then moved around to the other side and did the top.

Once it was all painted I got the black paint out and touched up over my pencil lines. In this case we used spray paint for the black, so I just held a piece of paper over the “B” and misted the pencil lines. Poof! They’re gone.

I thought it needed highlights. So I got some of the white paint left from the walls and added 1/2″ white border to the bottom and right edges. I don’t have any pictures of that process, but it’s easy and it adds a bit of dimension. I showed how I did that in my post about making an old sign. You can see it in some of the finished pictures below….like this one.

I love this letter so much I may have to paint one somewhere in my own house. Or maybe the shop. Maybe I’ll paint a huge 24!

Didn’t Becky do an awesome job picking the colors?! I love the pop of red.

Now she has the cutest darn potting shed in the west.
Head over to Becky’s to see the rest of the details on her potting shed makeover.

Follow me on Facebook to keep up with all of the happenings here!
Linking to The Shabby Creek Cottage Transformation Thursday.
what a great idea, it looks awesome!
You amaze me, Lisa. I have no artistic ability. Zip. Zero. Zilch. Yet you whipped up that lovely “B” like it was no big deal! 🙂 I’m talented at shooting skunks, does that count as an ability? (unfortunately we’ve had lots of experiences with this on our property lately….)
But seriously, isn’t it great the way God made the body of Christ – each of us w/ different abilities??
Aha! NOW I know why you sat there! Lisa you amaze me – I had no idea what was going on in your head. What a great “B” it is – and now I can “B” cheerful when potting my plants!!! That was certainly a full day of getting stuff done! Whew, glad we finished!
Becky B.
http://www.organizingmadefun.com
Organizing Made Fun
I love this idea! I am inspired!
Thanks for sharing!
Would love if you stopped by to link this up to my party happening now!
Stacey
love this! would love to have you share over at our party!
http://baked-inthesouth.blogspot.com/2012/08/made-it-by-monday-link-party_14.html
This is so nice! I’m jealous of her shed! My initial was a B before I got married. Now it’s an O. And for some reason it just seems weird to put an O on my wall. LOL.
Alicia, you could be like Oprah! LOL! Lisa~
LOVE this… heading over now to see the rest of this. I need an overhaul from Becky, too!