Personalize Your Wedding
For both of our daughters’ weddings we had small budgets and big ideas. To make their wedding special and not feel like we were missing details, we had to make a lot of things ourselves. That was fine with us; we enjoy doing projects together! And these were definitely a whole family project!
After telling you about how special my daughter’s wedding dress was, I want to keep the special moments going by sharing all of the ways we personalized that wedding.
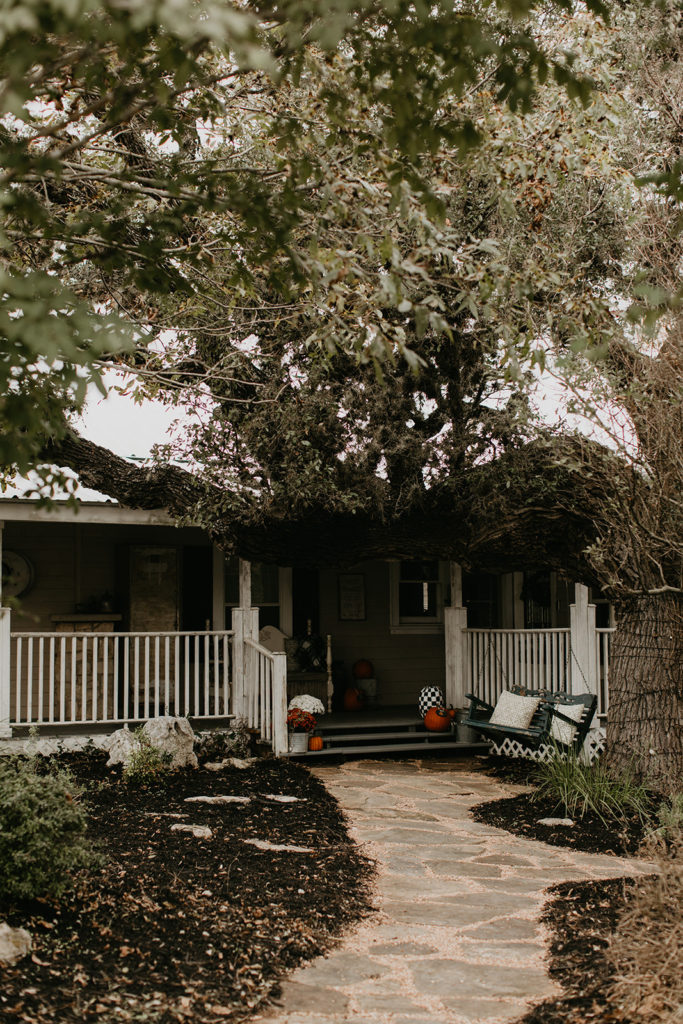
I am a big fan of sentimental moments, so I loved finding ways to sneak those little touches into our daughters’ weddings. From the moment our guests arrived we wanted them to feel loved and cared for. Walking up the path when you first arrived you see our front porch, I just freshened up all of my usual fall porch decor….believe it or not we blew all of the leaves away before the wedding and there it is all covered with leaves again. Some things you just can’t control.
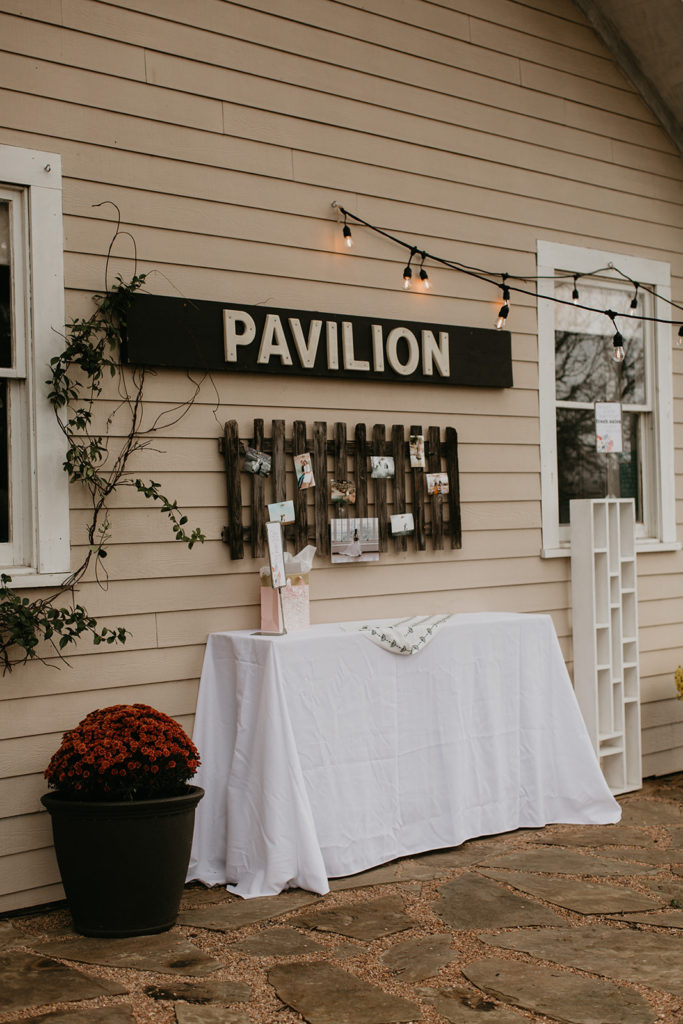
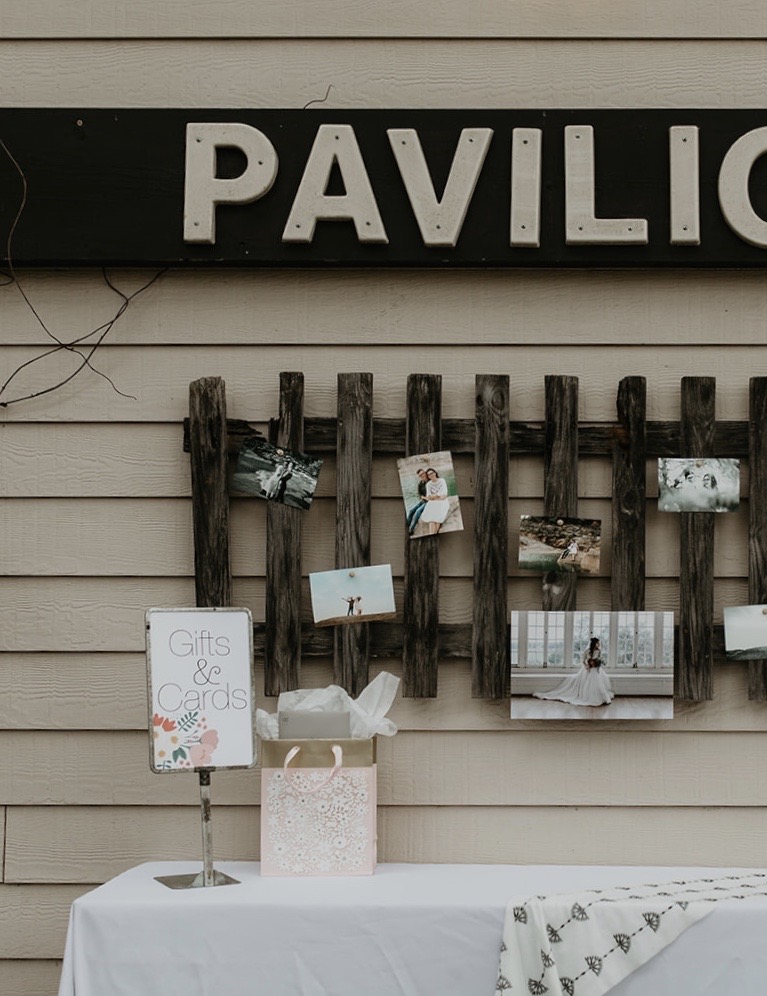
We have an outdoor eating area that we use a lot in the spring. It’s a great place to have dinner or just sit around talking. I found that Pavilion sign at a yard sale years ago and still love it, it hangs there year round. For the wedding we moved the tables away and put a sofa and a gift receiving table out there. Over the gift table we hung an old fence section that we used to display pictures of the bride and groom.
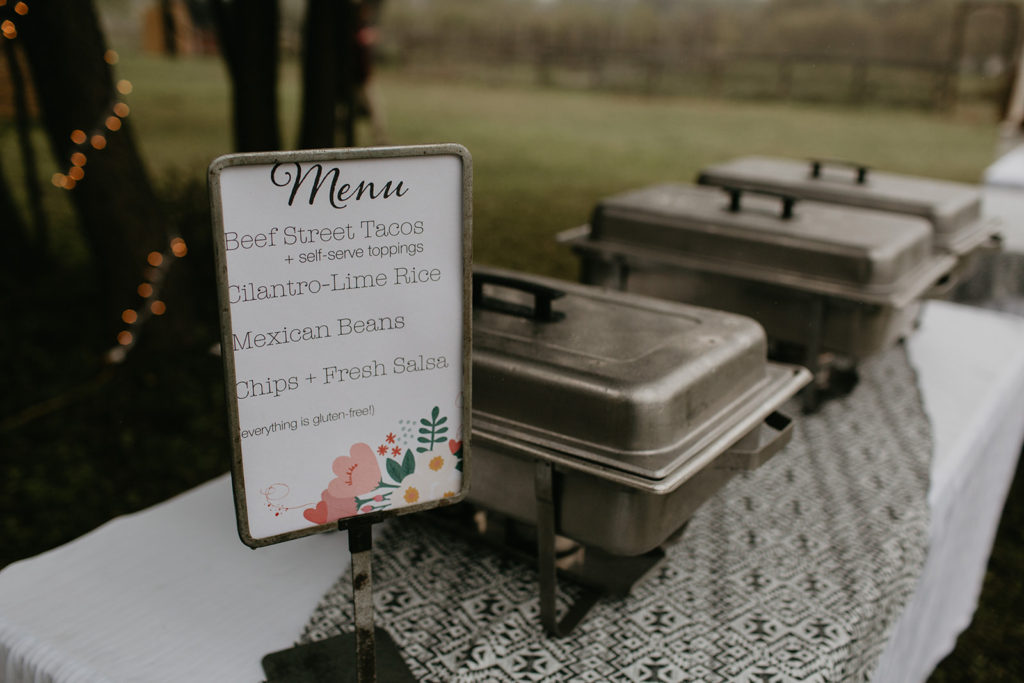
I used my Cricut for a lot of wedding projects. One thing I did with it is make signs to place all around. I found old store sale sign frames at a flea market a few years ago and they were perfect for holding these. I used the Cricut print and cut feature which let me design the signs in the Cricut Design Studio, then print them out, then cut them to perfectly fit my frames.
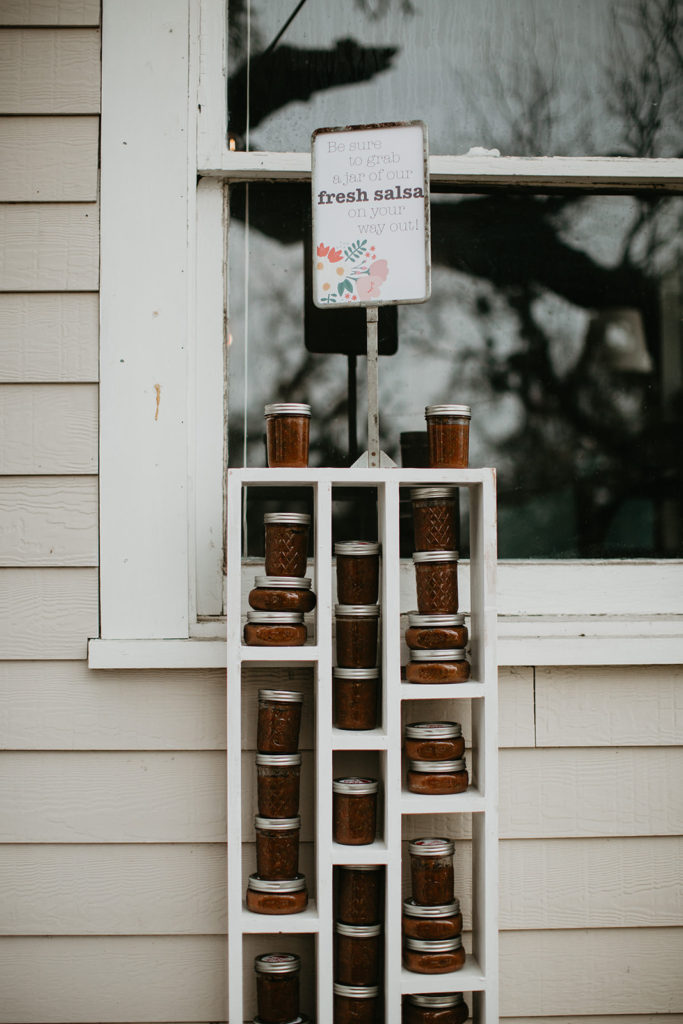
Right next to that table was where we put a little shelf to hold gifts for our guests. Because we were serving street tacos with homemade salsa for dinner, we decided to give each family a jar of our salsa to take home. I used a shelf I built several years ago to go on top of a kid’s desk, turned it sideways and screwed it to the house so it wouldn’t fall over. Then we loaded it up with the jars of salsa we made ourselves.
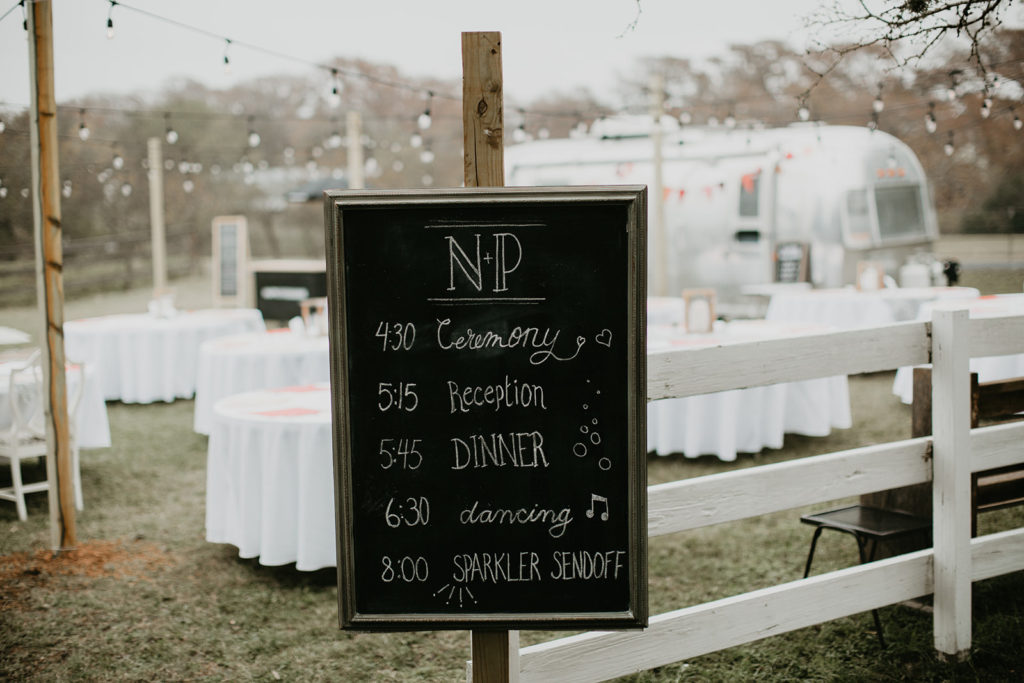
Right past that walkthrough area we posted the schedule. We didn’t want to print programs, so this was our solution. We attached boards perpendicular to the post and then attached the chalkboard to them.
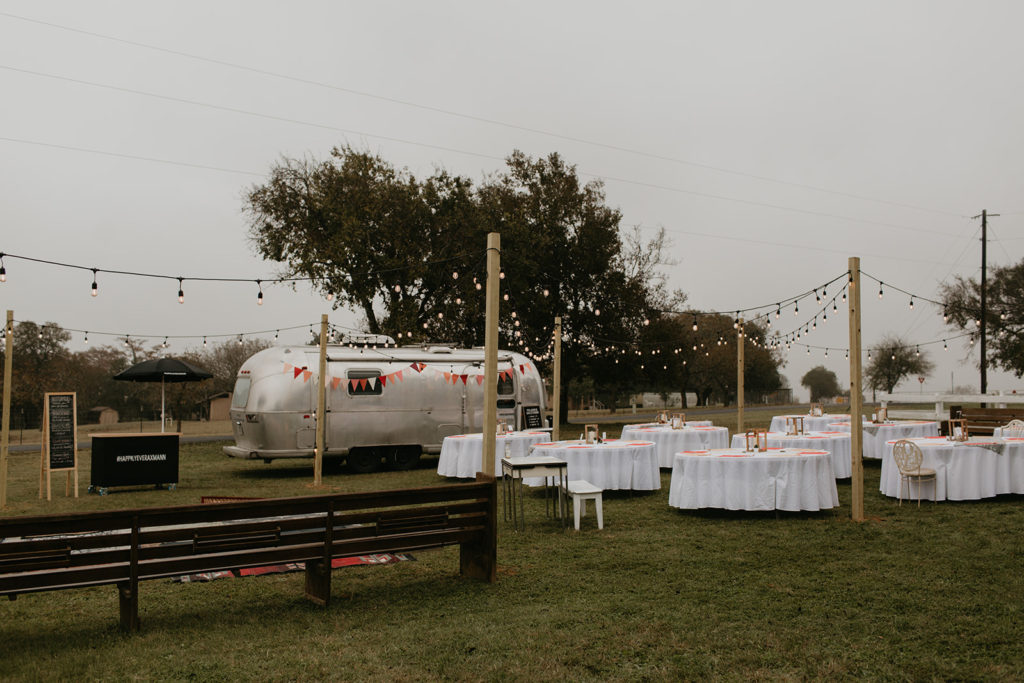
The whole wedding and reception took place at our home. The guests walked through the reception area, through a gate and down a path to get to the ceremony. We rented round tables and we put up posts to hang string lights. We borrowed the airstream from my sister-in-law, which was the perfect way to block off the street. I used my Cricut to make a quick banner string to dress up the airstream in her wedding colors.
Since the bride can’t eat gluten I wanted there to be nothing at the wedding she couldn’t eat. Because it was part of their first date and their engagement, the couple has an attachment to Steel City Popsicles. We decided instead of wedding cake to have a popsicle cart. My son and I built the cart and chalkboard sign to look like a little street cart. We used their wedding hashtag for the front and umbrella (another thing I did with my Cricut).
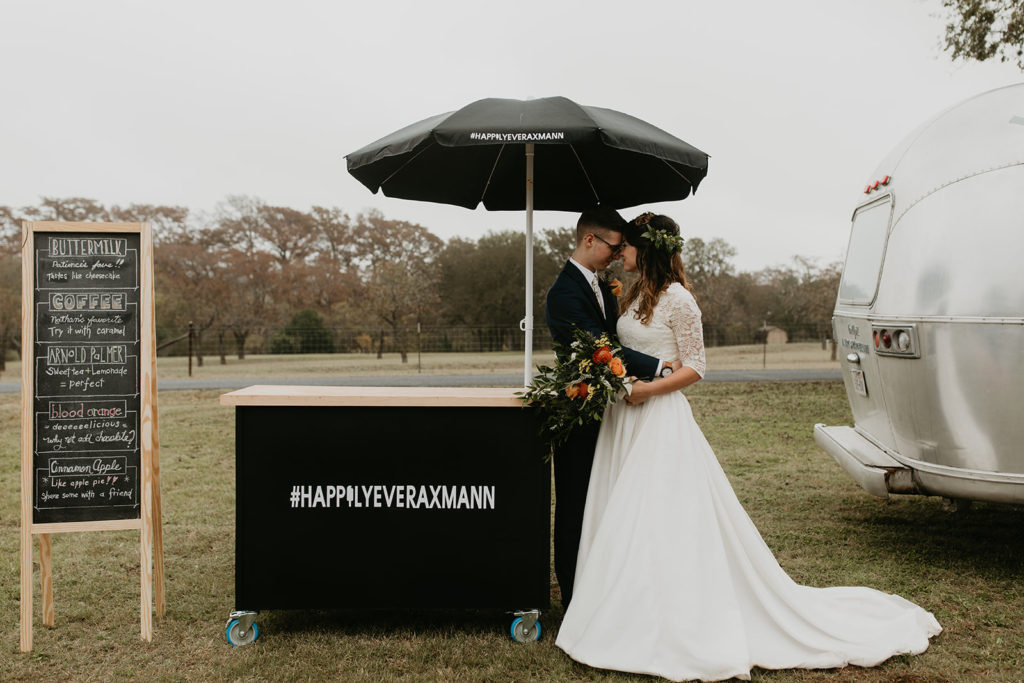
I wrote the descriptions of the different flavored popsicles on the chalkboard. Plus we had fun toppings if the guests wanted to get adventurous.
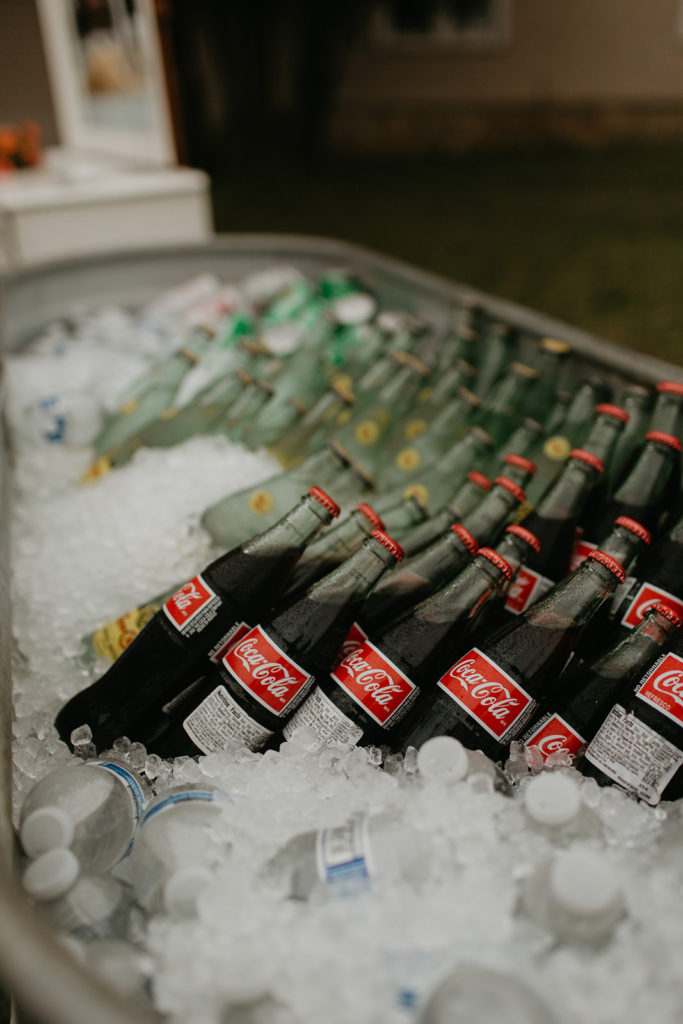
For drinks I really wanted to make it easy, so we just had bottled water, soda and my daughter’s favorite….Topo Chico. It was important to me that every detail reflected our families in some way. Even the trough was originally from one of our high school graduation celebrations. We put the trough up on blocks with a skirt so it would be counter height and then just let everyone serve themselves.
And here are a couple more of those Cricut signs. They were so quick and easy to make!
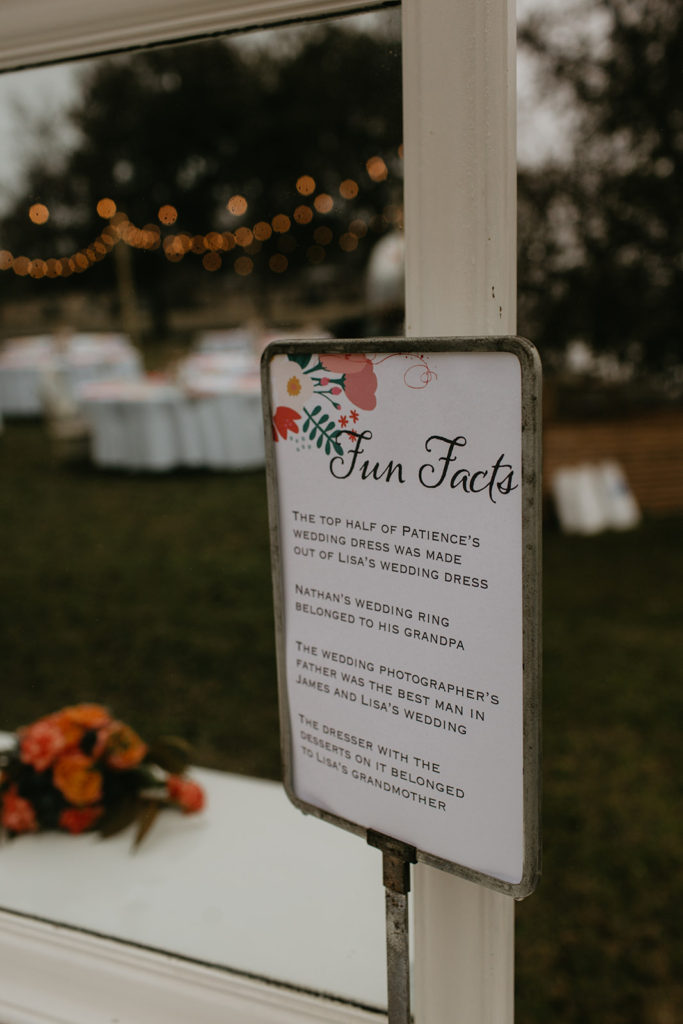
And this sign was so the guests would know about some of the special touches…
We also had some single serving desserts for those who didn’t want a popsicle. Because it had to be gluten free we made rice crispy treats, our Christmas fudge and our family’s favorite recipe for granola bars.
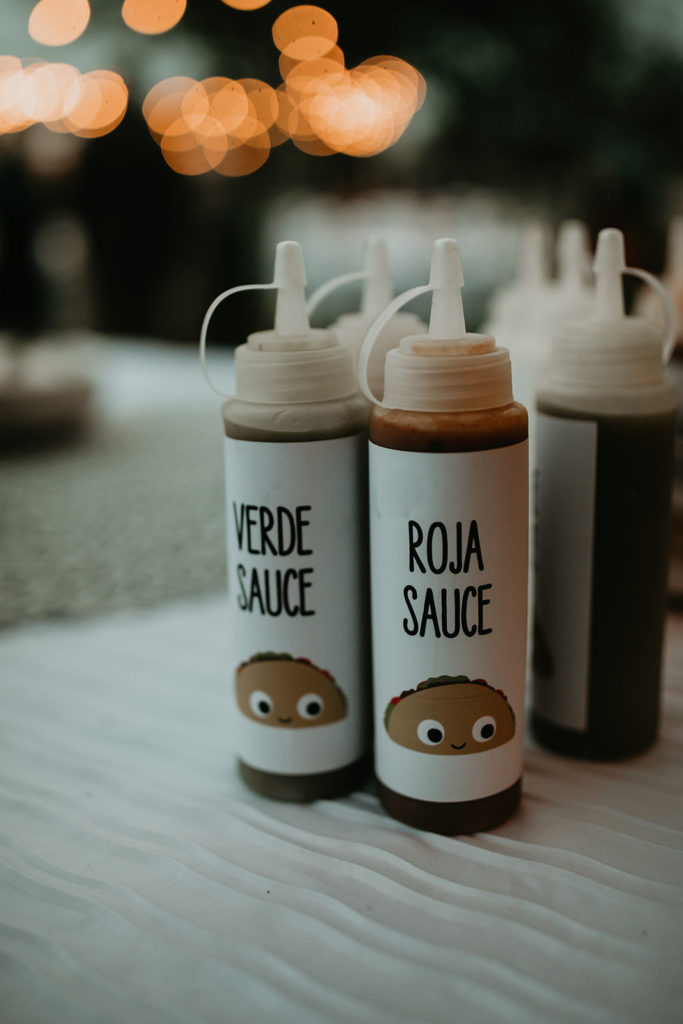
I made these little bottle labels using my Cricut also. There were some for the tacos and some for the dessert that had chocolate and caramel in them. I also made little stickers for the tops of the salsa take home gifts with this same method!
Her wedding colors weren’t easy to find, so we ended up making the cloth napkins. It was one of those projects we thought would be “SO EASY” but ended up being a royal pain in the booty and I wouldn’t do it again. Seriously ALL of us worked on them in an assembly line for days. It looks pretty though and the bride was happy with them, so that’s a win.
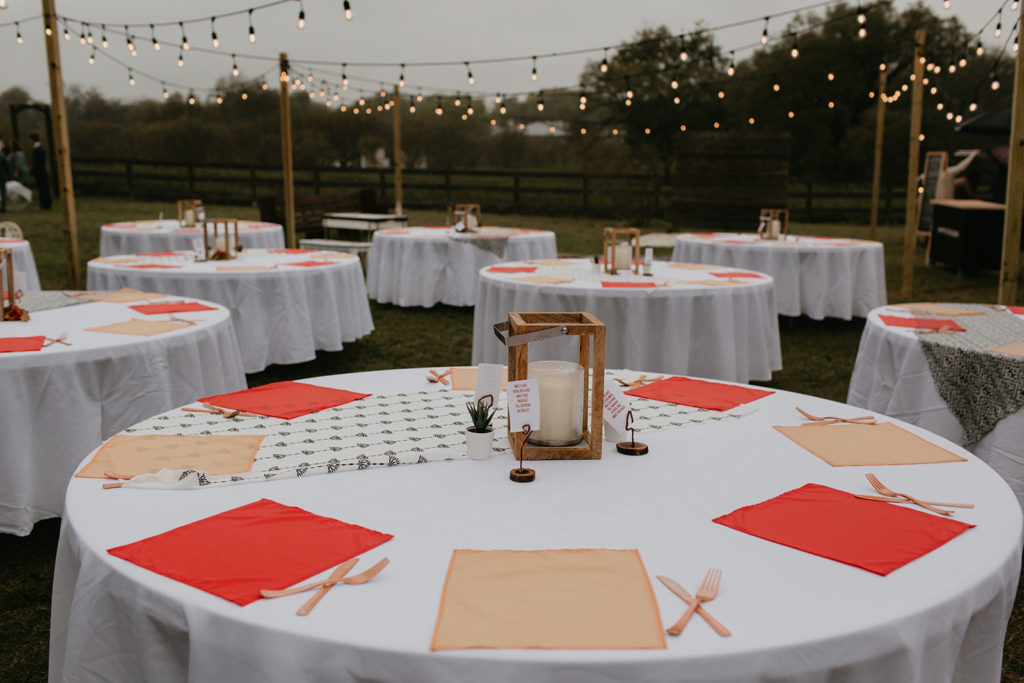
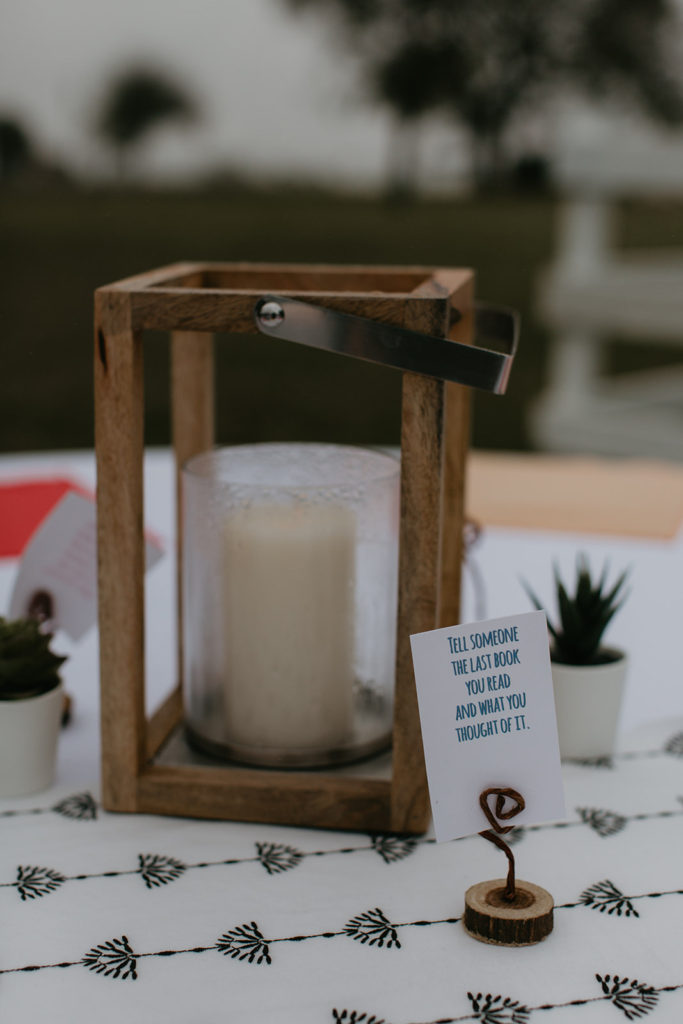
Those little cards on stands you see on the table, they were conversation starters. We drilled holes in small log slices to stand bent wire to make the holder and put messages in them to help our guests get to know each other better! We put three on each table.
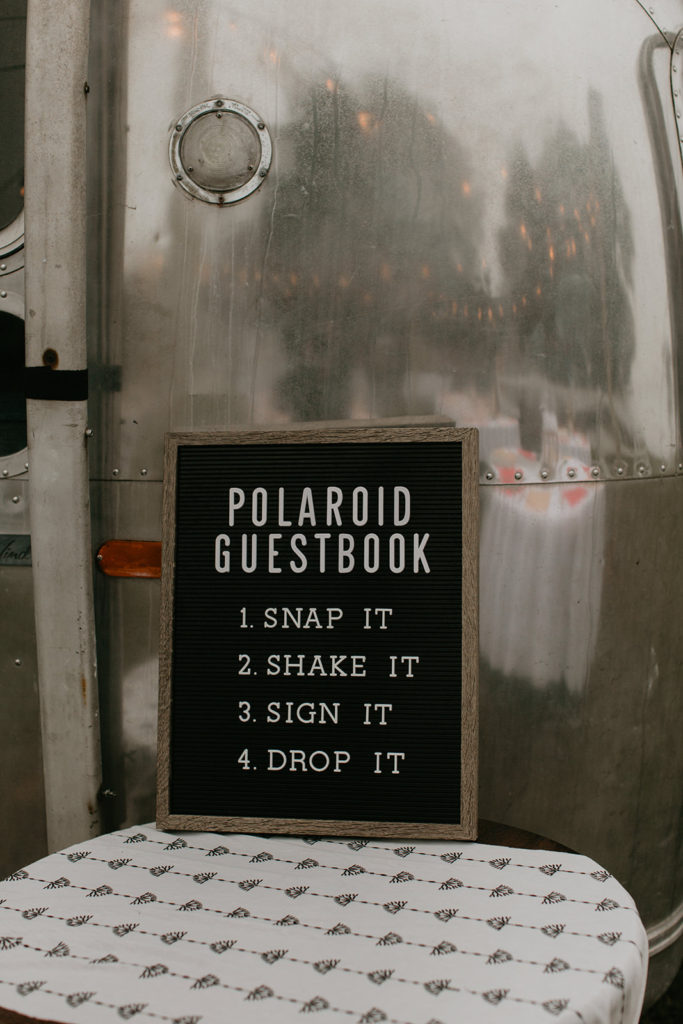
Instead of a guest book they wanted pictures of the guests, so we set up a station where guests could get their pic taken with an instant camera and sign their photo for the guest book.
I am going to stop here and tell you about the ceremony and actual reception soon! It’s all too much for one blog post. But what I want you to know from my sharing this is that you can make your wedding day whatever you want it to be! Get creative, don’t feel like you have to do exactly what someone else did. Make it all about YOU!
PS. Here is a tip I learned the hard way from bth weddings. TAKE YOUR OWN PICTURES!! I trusted the photographers would get photos of everything, but they didn’t. Even though we gave them specific lists we don’t have any photos of the sofa sitting area or the popsicle chalkboard or the adorable salsa jar lids or lots of other things. Just snap it with your phone. You’ll be glad later!