Easy to Make Disney Pumpkins
This post contains affiliate links.
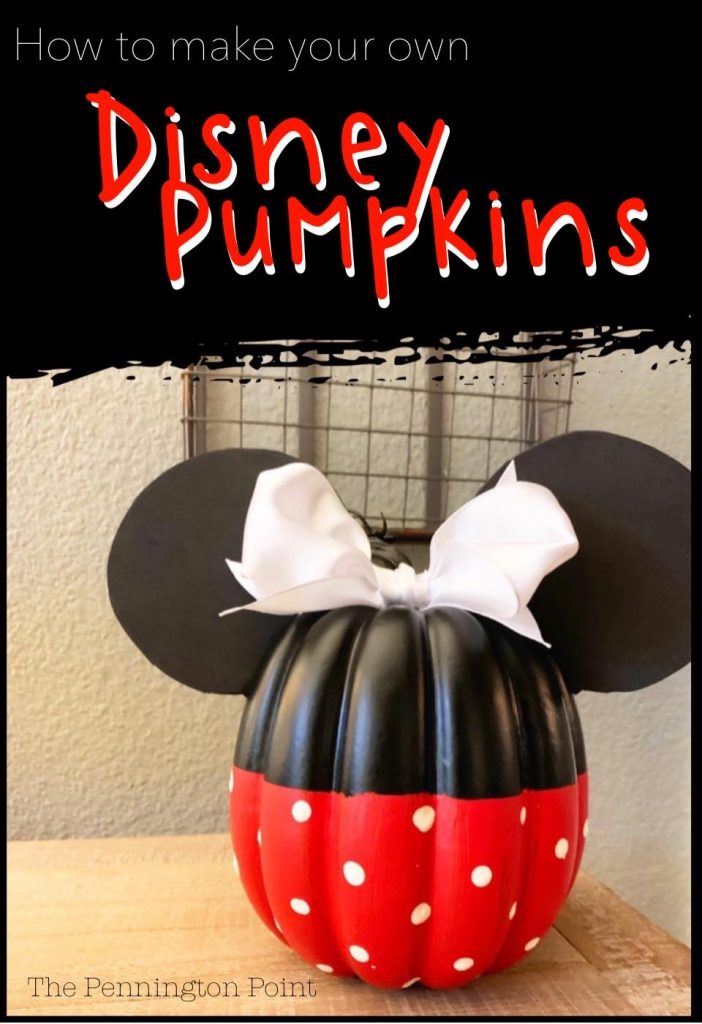
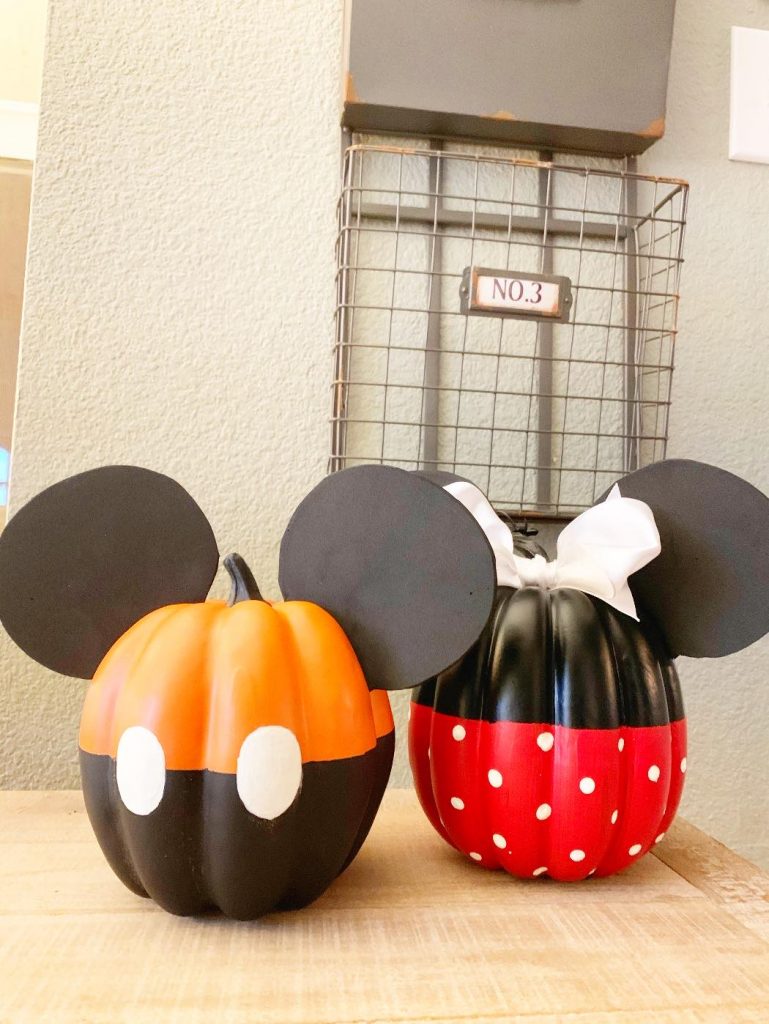
I decided my fall décor needed a little magic. Mickey and Minnie always cheer me up and remind me of our Disney trips and the fun we have there. I was already going to Target for a few things, so I grabbed some pumpkins at the dollar spot and they even had craft paint and some sponge brushes.

I had a few things at home already…the foam sheets and some ribbon were in my stash. The tools I used were scissors, a small paint brush or foam brush and a craft knife (my favorite is the Cricut Trucontrol!).
You’ll also need some painter’s tape. I didn’t have any so I used washi tape, which worked just fine. I wrapped the washi tape around the middle of the pumpkins, making sure to get it nice and snug in all the creases. Then I started painting. I decided to leave the orange on the bottom of Mickey and paint the bottom of the black pumpkin red for Minnie.
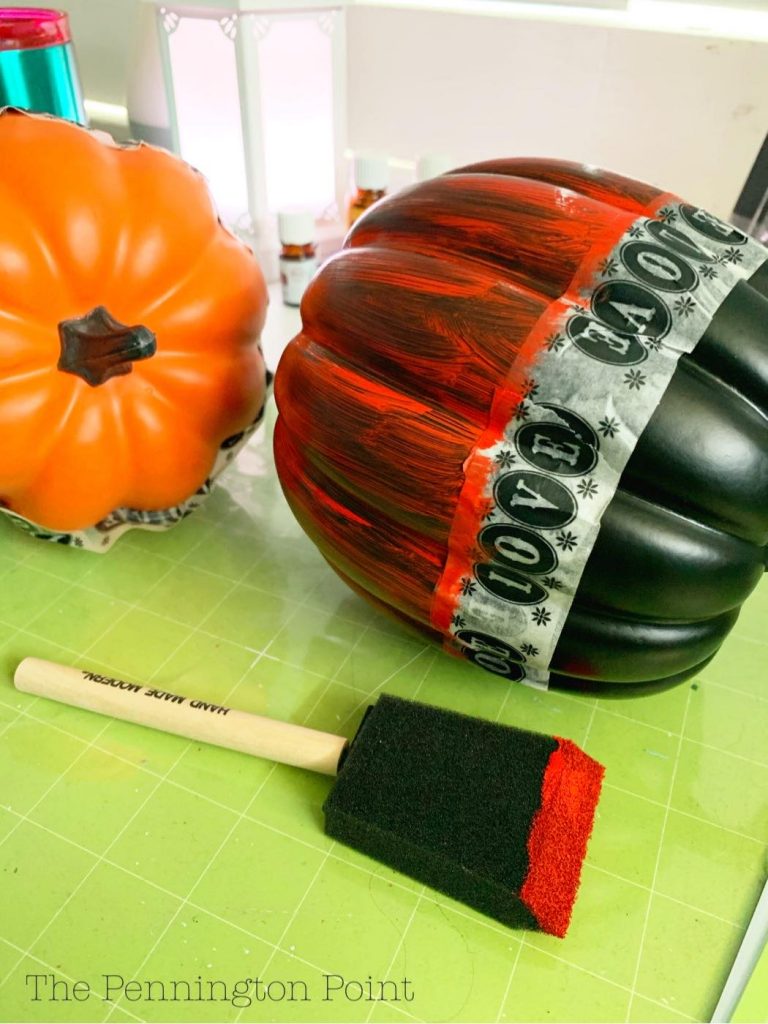
I use my old, no longer sticky, Cricut mats for so many things, one of which is to paint on. They are great catchalls when you just need a spot you can get messy. I wasn’t in love with this craft paint from Target. It took quite a few coats and took a long time to dry. Probably part of the reason for that is the pumpkins were slick and my expert paint skilz are lacking. But eventually, after many coats and waiting I was ready to remove the tape and keep going.
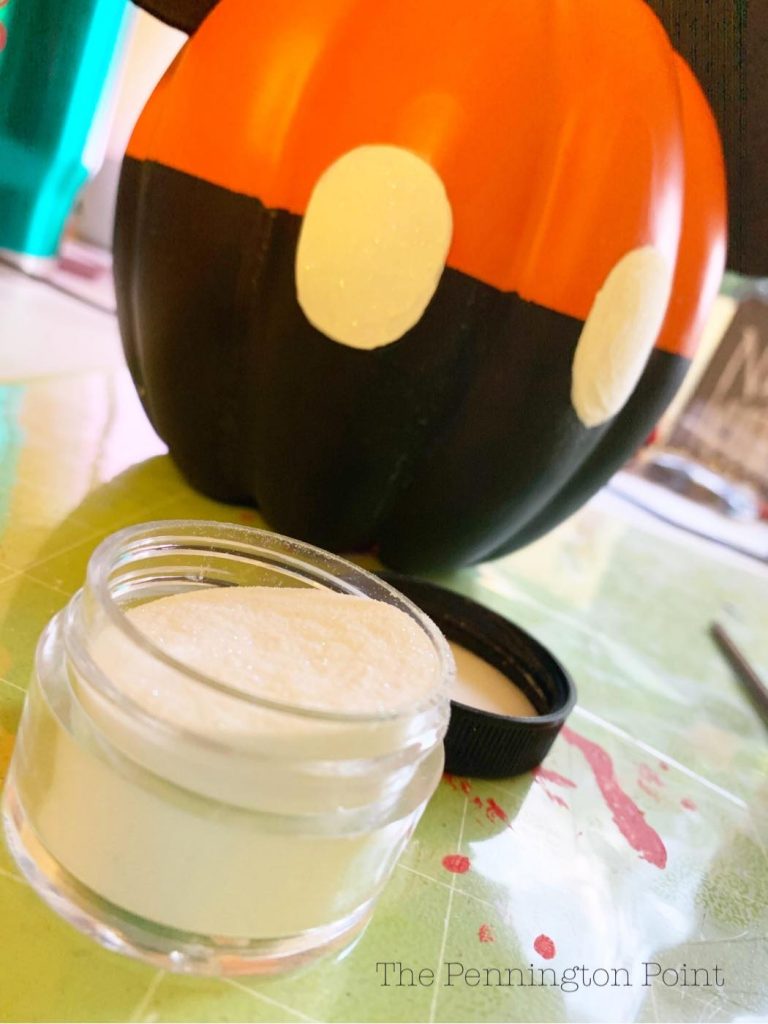
I decided to paint Mickey’s buttons instead of cutting them out on my Cricut. Even though I adore using my Cricut machine, everyone knows that a vinyl circle shape doesn’t sit well on a rounded surface. Just look at every Christmas ornament I added monograms to in 2007. Not. Pretty. So I cut out an oval with cardstock and traced it onto the pumpkin. Then I just painted it (another thing that took about 5 coats).
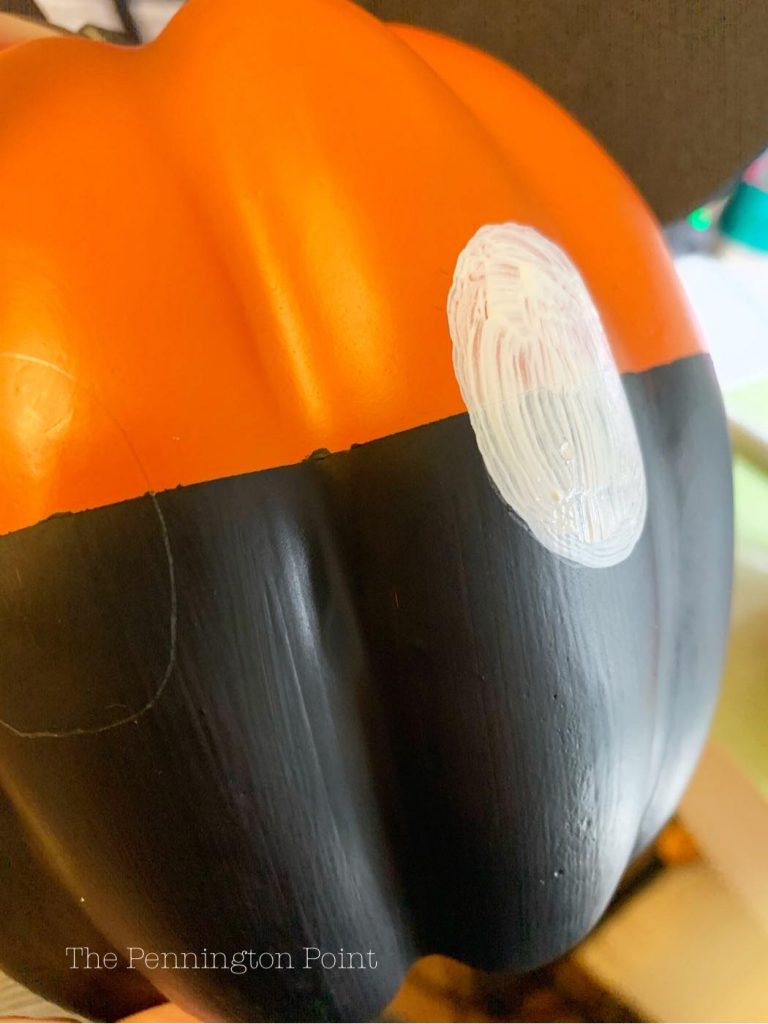
I know the line between the paint and pumpkin isn’t perfect, but I didn’t mind…you don’t even notice when it’s done.
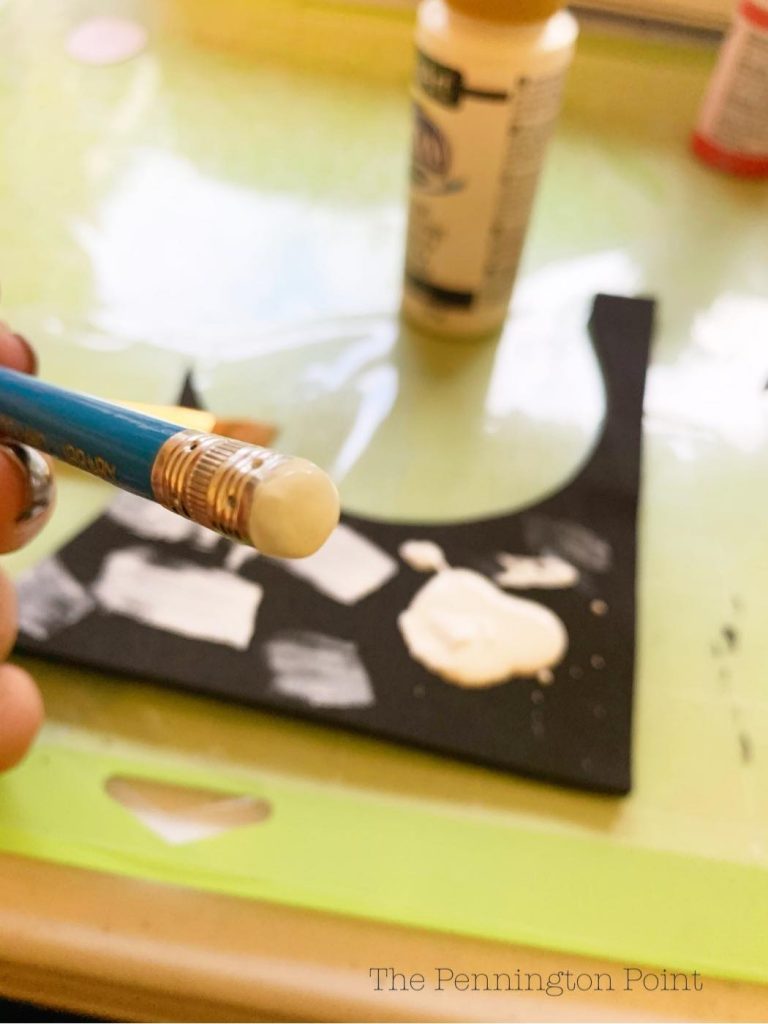
Next come Minnie’s dots. It’s not Minnie without some polka dots. I used a pencil eraser to make them. The trick is to dip it in the paint between every dot and just dab, don’t move it around. And you want to make your dots in a pattern, not random. Check out mine to see how I did it.
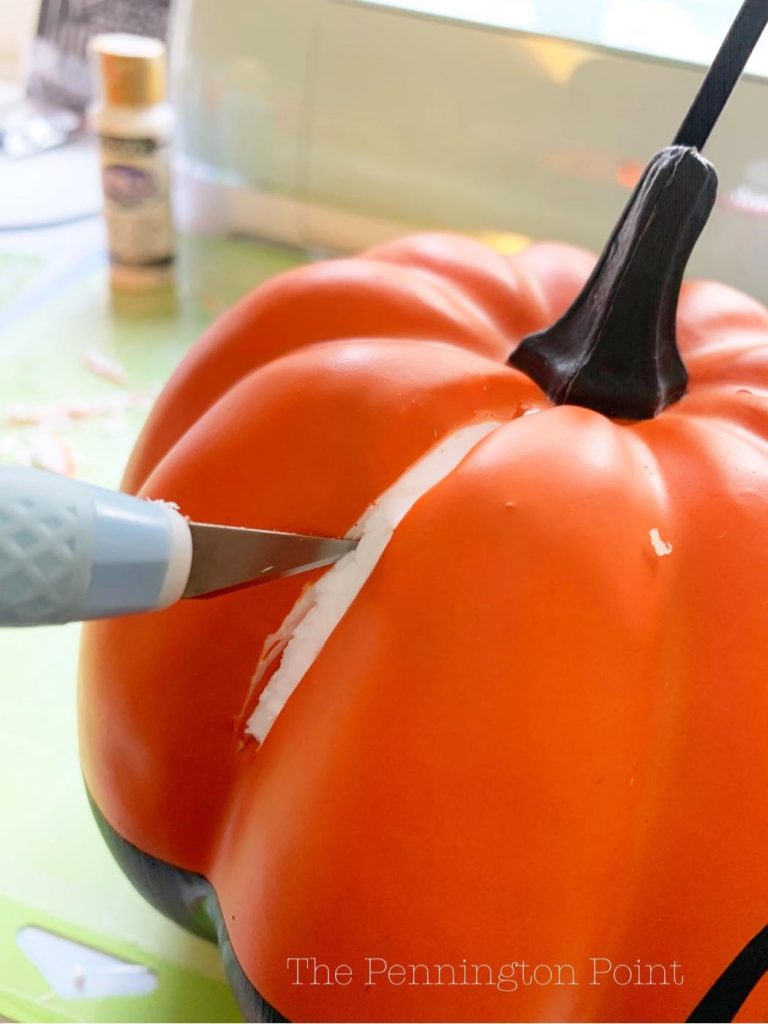
The ears were easier than I expected. I traced some of my official mouse ears to get the perfect shape. Then I traced that onto foam sheets and cut them out. I added a small tab at the bottom to stick into the pumpkin.
Once I cut them out, I just held them up to the pumpkin and marked where to cut the slice for the tabs. It’s a very technical procedure. I just slowly cut until the ears fit. These fake pumpkins were solid Styrofoam so I didn’t have to glue them. But if they had been hollow I’d have hot glued those suckers. I wouldn’t let kids play with these…the ears will come off easily.
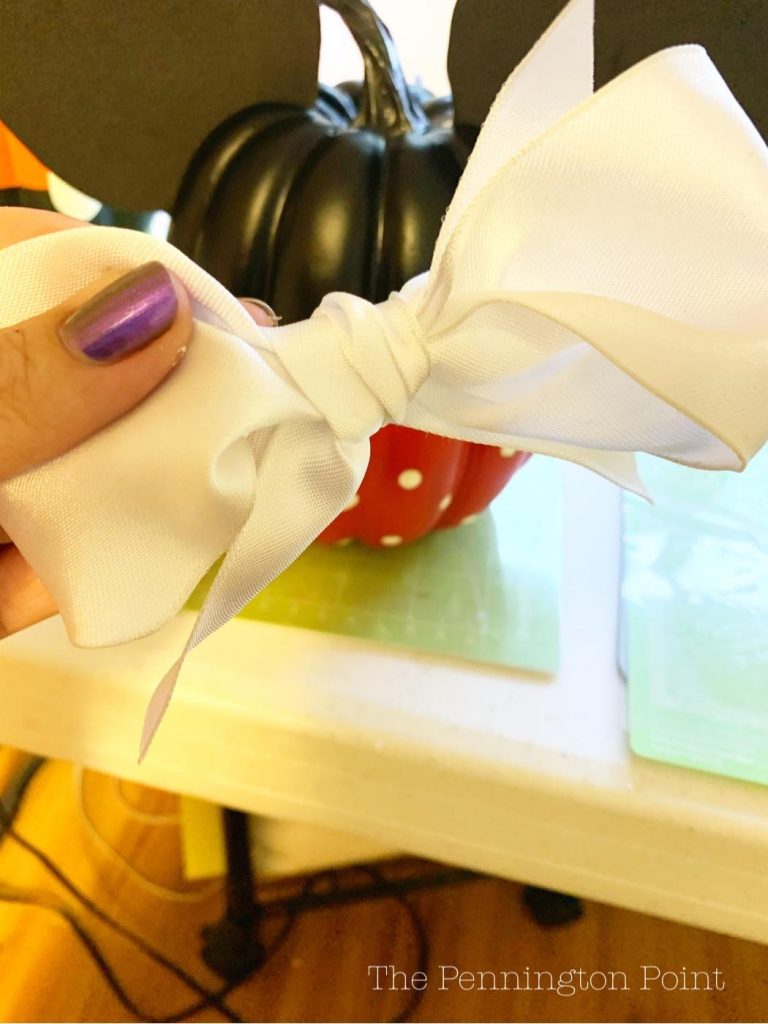
For Minnie I just used some white ribbon I already had. I’m pretty sure it’s leftover from Christmas gift wrap a few years ago. I didn’t make a fancy bow, I just tied it and hot glued it to the top, easy peasy.
At the last minute I decided Mickey’s buttons didn’t look magical enough so I dug through my craft things (I don’t have much anymore) and found some glitter. So I put that on the painted buttons.
And that’s it! The whole project took me about 45 minutes, but waiting for the paint to dry made it take longer than I expected. I prefer a half hour project.
Have fun making these!
If you don’t want to go search for the things you need to make them, here are some links…
Pumpkins, paint, foam brushes, foam sheets, painter’s tape, ribbon, glue gun, glitter
But seriously, you can find it all at the craft store or even the superstore for better prices! That list is just in case you need one thing and don’t have time to get out before the crafting bug strikes.
All of these links are affiliate links. Our family gets a small percentage if you buy them, but it doesn’t cost you anything!