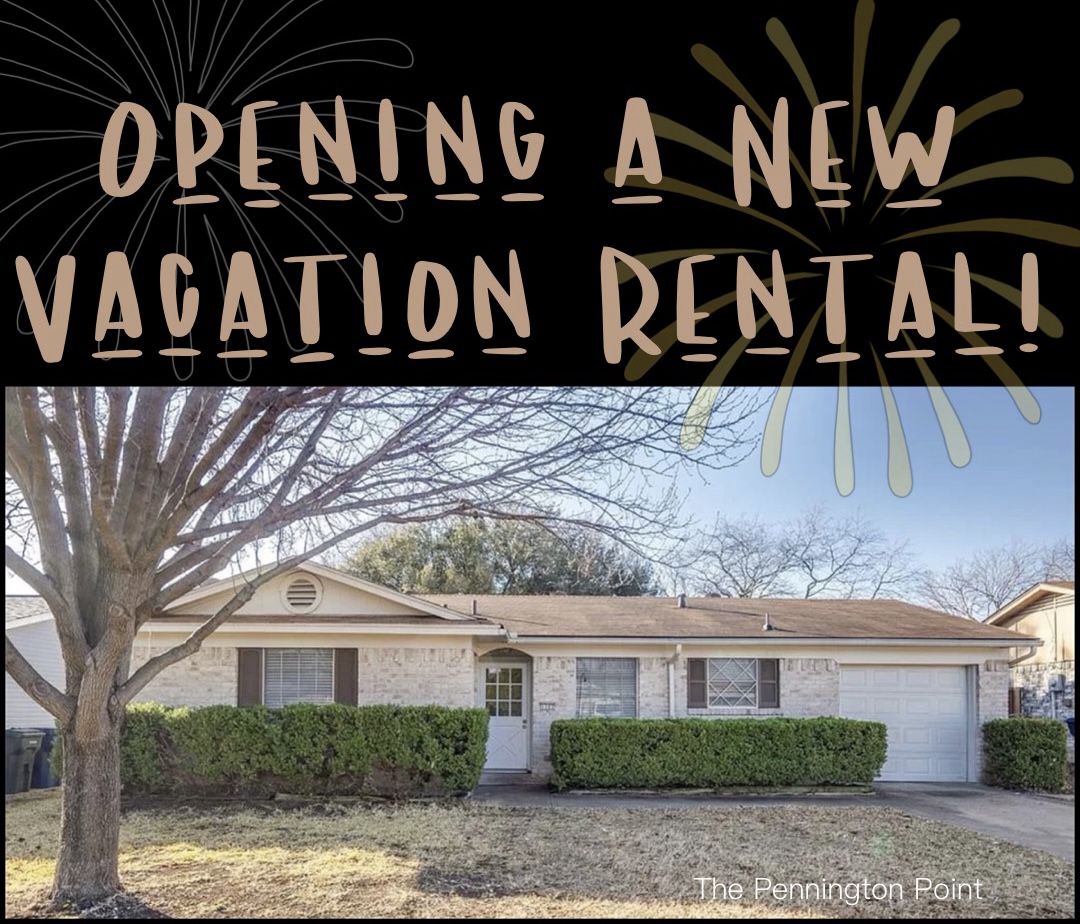
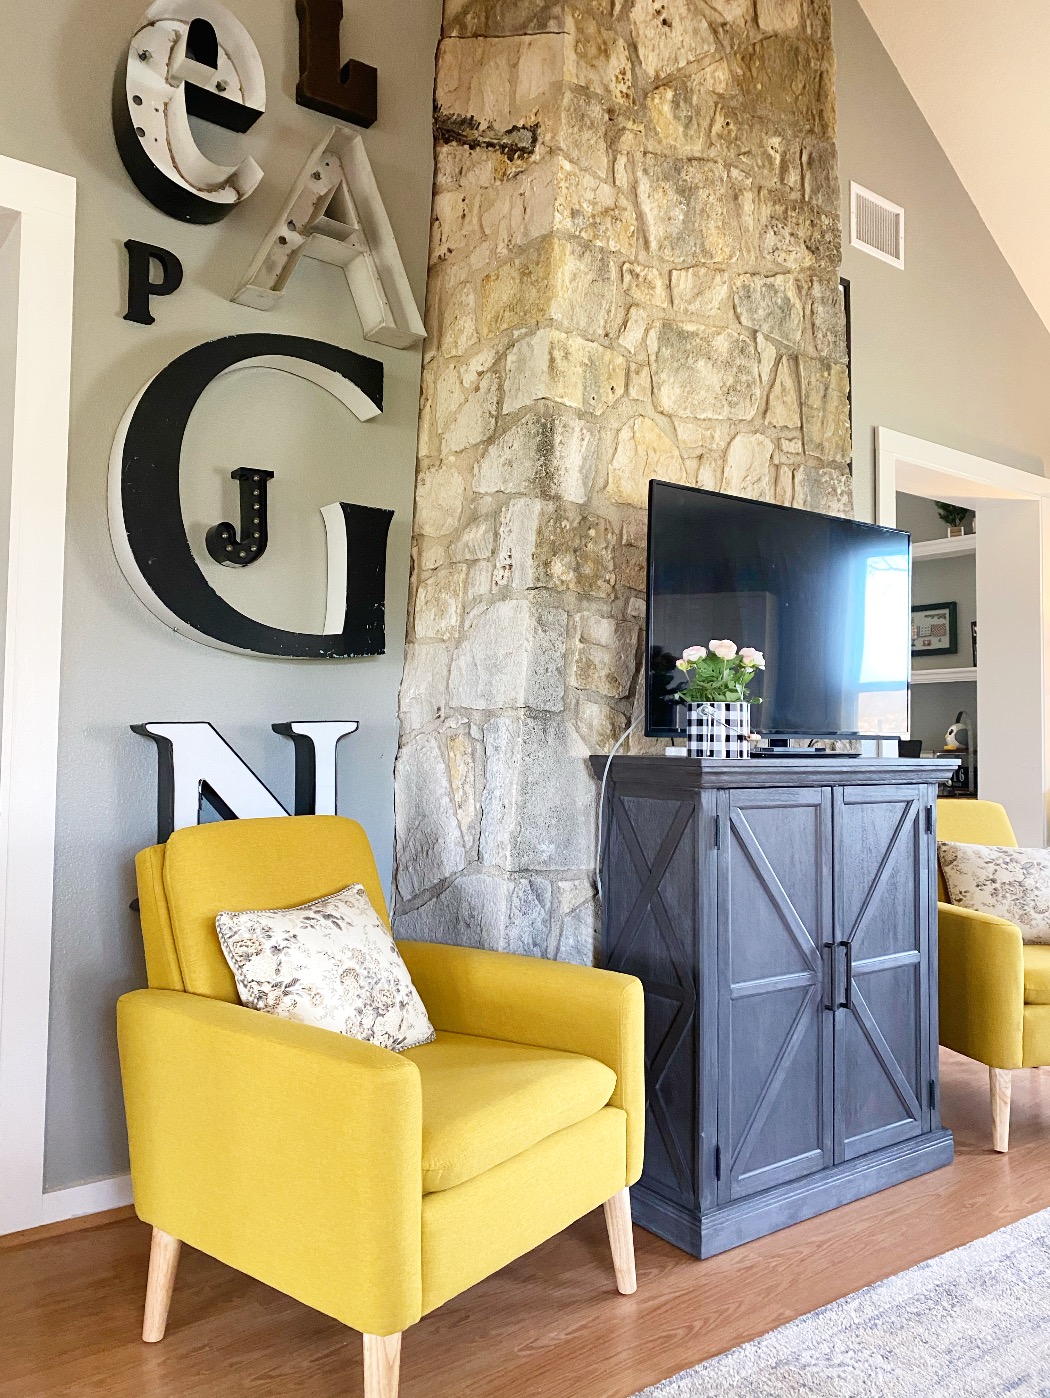
n

Gearing Up for Summer Projects

by Lisa on May 9, 2013

I’ve been planning a few summer projects and looking around the house and yard to see what I can do with basically no money.  I love a challenge and making my home nicer for free is one of my favorites!

My first stop for inspiration was Hometalk.  What I love about Hometalk is that it is more of a community, with people sharing ideas and not just a quick look.  Sometimes I want to just get an idea, but often I have questions and wonderings.  I thirst for knowledge.  Especially since I gave up Diet Dr Pepper.  I used to thirst for that.

So I hopped over to Hometalk to see what goodness I could find and there was plenty of it!  Awnings and pergolas and great plant ideas.  I’m all inspired now….so watch out!

If you haven’t tried Hometalk you should check it out.  There’s no cost, just sign up and follow people.  You can start by following me!  And if you don’t know anyone else to follow, I enjoy scrolling down the homepage and seeing all of the real people with real ideas!

I have a board on Hometalk with nothing but ideas for ways to use old wood.  Oh yes…..that’s just what I need for my free summer projects!

What projects do you have planned for the summer?


So much for easy, peaceful weekends.  Ever since starting my fitness challenge, I am up and at ‘em every morning.  It has changed my activity level drastically.  I am not sure how I feel about that yet.  In theory I should be glad that I am actually using my body for more than a recliner decoration, but my legs are crying out in opposition.

On Saturday morning I decided to do a job I had been putting off for too long.  My bedroom had become a waste dump for everything that didn’t have a place in the house.  Books, picture frames, kids’ drawings, blankets, pillows…..anything we didn’t know where to put but wanted to keep.  It was beginning to resemble an episode of Hoarders.

In addition, I had never finished cleaning up the nursery since moving Levi out about 3 months ago and I was starting to feel ashamed of myself for my laziness.  Since James was out of town this weekend, I thought it would be a good time to clean out the two rooms, get rid of the junk and get ‘er done.

As usual, my ideas are too big for my energy level.  The older kids all had things they needed to do (rude) and so I just had the younger boys to help me.  A willing heart is nice, but it’s also nice if the person helping you isn’t more interested in his jacket zipper than he is vacuuming under the chair you are holding up.  Let’s just say, it was a long morning.

After lunch I asked my older 3 girls if they could just help me for a couple of hours so we could get this job finished.  I promise you I wasn’t intentionally being deceitful, which they may have wondered at 8:00 PM when we were still working.

We had to clean everything as we moved it.  The amount of dust in my bedroom would have filled a king sized pillow.  And I didn’t even deal with whatever is under my bed.  I don’t look under there.  It scares me a little.

By late Saturday night we were all completely spent with barely enough strength left to shower and get ourselves to bed.  Even my high energy girls were strewn across my bedroom sofa like boneless chickens (Did you ever see that picture?…so funny!)

source: The Far Side

Yep, that’s what we looked like.

I didn’t take before pictures, but you’ve seen messy rooms, right?  Here’s what my bedroom looks like this morning.  CLEAN! I want to paint the faux oak cabinet in the corner.  I’m thinking of painting it a gray green.  What do you think?

I’m loving the panorama option on my iphone.  You can see almost the whole room!  The door on the right goes to a long, narrow room that used to be the nursery.  I don’t know what to call it now, so we’re just calling it “the old nursery.”  It is a spare room I can use however I want.  Right now it’s just a quiet place for anyone to go read, get away, be alone.  But I have a few ideas for this room.

On Sunday we were still tired from the day before so I just filled my shop orders and we rested.  Kids played outside, girls read, we ate leftovers….nothing too strenuous.

There’s something about having a big job done that gives you permission to do nothing for about a week.

Summing up….these are the questions I have for you.  1. What would you do with an empty, long, narrow room?  2. What color should I paint the cabinet in the corner of my bedroom?

Follow me on Facebook and Instagram!

Valentine’s Day Dice AND a Link Party!

by Lisa on January 28, 2013

Happy happy joy joy!  It’s time for our Valentine’s Day link party to begin!   Whoop for red, pink and white!

I love Valentine’s Day so much that I can’t help myself.  I am driven to come up with new ways to decorate every year. This year I decided to add some whimsy to the mantle by making some giant red dice with white hearts for the “dots”.  It was a quick, super easy (FREE!!) project.

I cut some scrap 4x4s into blocks, sanded them a little and spray painted them red.  5 Minutes tops.

Then I borrowed my friend Sara’s heart punches and made some little white hearts with plain cardstock.  The best kind of friends lend you their punches (gee, I hope Sara isn’t expecting some Valentine’s Day blocks as a thank you).

I just glued the hearts right on there.

Then I got the easiest idea of stringing a word between the dice……LOVE.  So I made a paper clip chain.  Elementary school style.

And stapled the ends of the chain to the dice.  Hang with me here….it will make sense in a second.

I had these fabulous candlesticks that I got on clearance at Target that were begging to be used for this project.  Just set the dice up on them….doesn’t get any easier than that!

After I glued my Cricut letters to each card I simply used a safety pin to punch a little hole in the tops of the cards then slide a paper clip through.  Clip them onto my fancy chain….done.  BAM!

I pulled a few more cards from the deck (sorry kids….I hope no one wanted to play Go Fish today) and used tape to make a little house of cards.  Seriously elementary school.

I recently bought a roll of tickets from the superstore, so to finish it off I pulled off a long strip of tickets and punched hearts out of it.

And we’re done!  I heart my mantle dice and card decor.

Head on over to my peeps to see their amazing, adorable, delicious Valentine’s Day project ideas!

Now it’s your turn to show me whatcha got!  Come link up your Valentine’s Day projects and don’t forget to add a link back to our party!

Linking to A Bowl Full of Lemons


House of Rose

SNAP!

My Bedroom is My Oasis

by Lisa on January 14, 2013

I just love my bedroom.  It’s my place to getaway and relax at the end of a long, hard day.  Or an easy day….either works.

The warm colors are relaxing.  I made the headboard out of ceiling tiles I found at the flea market a few years ago.  And I change the throw at the foot of the bed each season.  The furry one on there now is perfection for the winter.

I’m not in love with the bedside tables.  They function well, but I’ve always dreamed of putting mirrored bedside tables on each side.  If they didn’t cost half a thousand dollars each I just might do it.  I’m still searching for ways to make them myself. Then a couple of pretty lamps and I’d be in bedroom heaven.

Over the bed is a little door that went to the kitchen pantry when we bought the house.  Instead of throwing it out when we remodeled the kitchen I kept it and used it here.  We glued book pages to it and added a few peaceful words.  I’ve thought about adding more words.  It could turn into a collection of words that describe our life.  Of course, that might not be relaxing at all.  The bedroom is where I go to pretend my life is all good.  No bad words in there.

That chair on the left….it’s my beloved recliner where I do my work.  I get my computer in my lap and lean back, pull the furry throw over me and start typing away.

Speaking of the furry throw, I’m sharing 5 ideas for adding winter touches over at Life Your Way today.  I hope you’ll head over there and say hello.

Usually my bedroom is a mess by Sunday.  Everything from the week gets tossed in there.  Then on Sunday afternoon I clean it all up and get it ready to catch everything again next week.  The cycle of life.

So, how do you like your bedroom?

Head over to Life Your Way to see more winter decorating ideas.


Looking Back

by Lisa on December 27, 2012

I’ve been evaluating the past year and making decisions for 2013.  I thought it would be fun to look back on my most popular posts of the year and see what you all have been the most interested in.

January:

It was so funny to me when I saw that my most popular post in January by FAR was when I fell in the movie theater and broke my foot. I’m so glad you all enjoy a clumsy story because I am full of them!

February:

I wrote my most popular post ever in February, “20 Ways to ‘Reset’ When the Kids are Having a Hard Day.“  It was a quick idea and it went viral on Pinterest.  How fun is that?!  I wouldn’t be able to do that on purpose if I tried.

March:

The girls and I did a bridal fair with our shop.  We made a bunch of new products for the fair and those have become some of our favorite products we sell.  In fact, we are working on changing a lot of our products and the best ideas came from getting ready for this show.

Also in March I started my Intentionally Parenting Your Toddler series which has been wonderful.

April:

My clothing tips for plus-sized gals has been well received.  I liked sharing that with you all and I will be doing more of it in 2013.  In fact, we have a whole new series coming up on modesty on a budget (for plus-sized, teens and everyone in between).

May:

I wrote about how I keep our homeschool area organized that was well liked.  Homeschool supplies and projects are a mess to keep up with, so I was happy to share how we manage.

June:

In June we finished up some much needed outside work on the house.  My favorite and the month’s most popular post was the front porch makeover.

July:

I have 2 top posts in July.  First, I went to visit my friend Becky in California and we made over her potting shed while I was there.  I posted about how I painted the giant letter on her wall. It was so much fun to do!

Also in July I did a quick little makeover of our back deck.  It was a really easy, frugal project that we are really enjoying.  I am going to add to it this summer….it needs a table or bench.  I love doing things for free!

August:

There are 2 posts from August that stand out.  The first is when I shared about how hard it has been for us to find a church.  You all had some great thought to share about that and I appreciated the great conversation in the comments.

And y’all were so sweet when I told you about losing our dog and how Noah had to grow up and do a man’s job to help me.  It’s was so sad and touching.

September:

We finally finished the girl’s attic bedroom and it turned out so cute!  They are enjoying it up there….at least the giggles I hear coming from up there make me think so.

October:

In October I did a 31 day series called, “31 Everyday Ways to Connect with Your Child.“  If you missed it….you will want to go and look through the ideas.  You will be inspired to spend some quality time with your kids….no matter what their age.

November:

I wrote a list of 5 questions about getting to know you and asked y’all to share your answers.  It was so much fun to get to know you all a little better!  I’m definitely going to do more of that in this coming year.

December:

Even though there are still 4 days left, my most popular post so far this month is one I wrote called, “Woman to Woman: On Giving Advice.“  I was so glad to see it was well received.  Encouraging each other toward godliness is one of my favorite things to do.

If you have written me and asked a question and I never replied, I am so sorry.  I can’t reply to all of the emails I receive and still take good care of my family.  But your questions are important to me and I do try to answer if I can.  I am so grateful for each of you and blessed that you stop to read my blog and when you leave comments it always brightens my day!

We’ve got some fun plans for this blog coming up in 2013 and are excited to keep getting to know you.

Have a wonderful new year!

10 Minute Christmas Table Decoration

by Lisa on December 5, 2012

Since this time of year is so busy, I needed to put something simple together for my school table.

This table is in my dining room right next to the table we eat on.  It’s central to everything in the house…its the room we walk through to get anywhere else.  So it’s important to me that it looks nice despite the fact that 11 people eat there and do schoolwork there everyday.

I decided to do something silly and easy.  I rounded up some jars and some leftover ribbon and spray paint, bought a few bags of marshmallows and went to town.

I spray painted the rusty old jar lids and tied ribbons to the others.  I filled the jars with marshmallows and voila!  Finished.

10 minutes…tops.  And that includes gathering the supplies and cleaning up.  Booyah!

The boys think it looks, “SNOWY!”

If you decide to make your own marshmallow wonderland, here’s a tip: PUT the marshmallows in…don’t just pour them.  If you don’t place them purposefully then all you see are the small ones and the big ones end up hidden.

Sounds like a life lesson in there somewhere.

What do you like to do on your holiday table?

Follow me on Instagram for more holiday home dec ideas!

My friend Angie at Country Chic Cottage has LOTS more quick Christmas crafts!


A Forest or a Mantle…Who Can Tell?

by Lisa on December 3, 2012

Happiness is a family fun mantle for Christmas.

Before I show you anything I want to say that my mantle is the hardest thing to photograph in.the.world….except for crying babies and the bulls of Pamplona.  Even those probably have better lighting than my dining room mantle.  I’m open to suggestions.  I’ve tried everything I know.  Which isn’t much.

So back to the important stuff….instead of the typical adorable, fancy mantle I usually do I decided on something different this year.  I wanted a whole forest of trees and to get all of the kids in on the action.  We spent an afternoon making trees with whatever I had on hand and ideas we got from either Pinterest or our crazy brains.

Here you go…..our forest style Christmas mantle.

Isn’t it sweet?

We made so many trees that I’m going to present them a little at a time all week.  If I tried to do it here this post would be as long as “War and Peace” and just as exhausting.  We’ll spread it out…..give you a break.

In addition to the trees, I made a loooong strip of 3″ wide burlap and wrapped it around the base of everything.  Then I made some 5″ x 12″ strips with the words “peace,” “joy” and “praise.  I wired those to the store bought trees we had from last year.  The burlap pulls everything together.

There were so many trees that they were almost falling off the mantle.  So we moved about half of them to the shelves across the room.  The shelves are not quite ready for their close up, but you’ll see them in the home tour next week.

Today’s contributions to our Christmas forest are from Levi (5) and Noah (13).

We gave Levi a piece of paper and some crayons and told him to make a tree.  This is what he made.

Patience cut it out and added the stand.  So cute.  So Levi.

Noah did what Noah does best.  He made a couple of trees with Legos.

We couldn’t have a family forest without Lego trees.  It wouldn’t be right.

I can hardly wait to show you the rest.  The best part is we did it together as a family.

If you’re following me on Instagram you’ll see behind the scenes pictures.

Linking to: The Better Mom, The Lettered Cottage, Transformation Thursday

Something New for Your Fall Mantle

by Lisa on September 25, 2012


I was feeling like I needed something new this year for my fall mantle.  I don’t know why, just an itch.  I showed you the fall candle holders I made in less than 15 minutes. After that I wanted to try something else with the 4×4 pieces we have everywhere.  So I rounded up a few more things to stick on top of them.

love letter blocks

I cut a 4 blocks in varying heights.  I didn’t measure any of them.  I just cut whatever size I felt like.  I’m like that…..just free as a bird.

After a quick sanding, I used my brad nailer to shoot a little scrap of support on the top about an inch back from the front.

One more shot with the brad nailer and we’re almost finished building these babies.

One more quick thing….

I took the finished letter blocks and my little bottles of acrylic paint and added some stripes and spots.  I don’t know why I didn’t get a picture of this process.  But there was no plan….I just played around.

And the finished blocks look so cute on my fall mantle!

My fall mantle is just making me happy.  To see a step by step guide on how I put the whole mantle together check out my post over at Life Your Way.

Are you following on Facebook for more tips and ideas?!

Linking to:


The Girl’s Attic Bedroom is Finally Finished!

by Lisa on September 19, 2012

Finally, after a month we have the girls’ room finished!  I’m not even really sure why it took so long.  We got most of it done in a week, but the little details dragged us down.  There are still a few things we want to do, but at this pace it will be a year before we are totally done so I’m just showing it to you.  As is.  No refunds.

This is what it looked like before:

That was before we moved Hope down into her own room.  Then we started painting.  And it looked like this:

girls attic room

While the girls painted, the boys and I built shelves.

And now…..this is what it looks like:

girls attic room

The biggest difference is, obviously, the back wall.  After we painted it black, the girls spent 2 days painting the words.  Their older sister Hope helped too.  It seemed to take forever, but we all just LOVE it.  They chose the words and I arranged them.  The dramatic wall is exactly what this tiny room needed.

But it also desperately needed book storage.  Before the makeover, books were stacked all along the walls.  Now they’re all tucked onto shelves with room for more!

girls attic room

The little shelf that I built for Faith’s desk holds all of her craft supplies.  It amazing what a difference it makes in storage.

girls attic room

She’s so adorable with all of her recycled containers and vintage boxes.

girls attic room

Look what she did to her chair…..this girl is full of style.

girls attic room

Patience has her own study/workspace on the other side of the room.  We took a bunch of mismatched shelves and painted them all white and put them in the corner.  She’s got it all organized.

girls attic room

We spent several months searching for bedding.  We couldn’t find anything that would work with the colors we wanted that was in our price range (which was close to $0).  Then one day I spotted a king sized quilt in the clearance section of Walmart.  So I bought it and we cut it into 2 tops and added a skirt to each piece.  That not only worked with our low budget, but it hides everything under their beds to they can use that space for storage also.

girls attic room

We all agreed that we would use a reddish-pinkish-teeny-bit-orangish as our one pop of color.  After several trips to the hardware store for paint swatches we settled on a color.  These are the old IKEA bedside tables that were up there already and we just painted them.  Believe it or not, I found the headboards in someone’s trash!  We cleaned them up, painted them with the same black paint we used on the back wall and they make such a big difference! Sing it with me, “FREE!”

The “peace” and “joy” pillows are new products in our shop.  Cute, cute, cute.

We turned the dormers into closets, so each girl has a dresser & clothes rack in her “closet”.  The curtain just covers half of the closet to give it a little privacy.  I had 2 curtains, still in packages, in the storage building.  I have no idea how old these curtains are or where I got them.  But they were free so we made them work!

girls attic room

Patience used her empty closet wall to display her photographs and artwork.

girls attic room

These 2 girls worked really hard on making over their room.  And I know they are loving having a fresh, clean space to live.

girls attic room

Thanks for keeping me on my toes and checking in with me about this room.  I am so glad to have it finished!

Follow me on Facebook for bonus pictures!

Linking to:

TDC Before and After

15 Minute Fall Candleholders!

by Lisa on September 5, 2012

I’ve got a great little 15 minute fall project.  In fact, I had the kids time me to see how fast I could do it.  But I have to be 100% upfront….I have a workshop that has the tools already set up and I have a belt sander, so it may have been a little faster for me than if I didn’t have these things.  But I think it still would have taken close to 15 minutes even without that advantage.

You see, we have been building a fence.

15 Minute Fall Candles

So we have all of these short pieces of 4x4s just hanging around.

15 Minute Fall Candles

So I picked up some candle cups at Hobby Lobby and decided to make a couple of simple, quick candle holders for my fall mantle.

Ready…….set…………GO!

Minute 1: Cut the 4x4s into random sizes.  I didn’t measure, just cut.

Minute 2: Sand the rough cut edges with my sander

15 Minute Fall Candles

Minutes 3-4: Screw 3 candle cups onto each 4×4 block.

15 Minute Fall Candles

On each block I added a small piece of wood under one cup to give it a slightly different height.

15 Minute Fall Candle

Minutes 5-8: Spray paint the candleholders…one orange….

15 Minute Fall Candles

and the other burgundy….

15 Minute Fall Candles

Minutes 8-10: Wrap scraps of twine and fall leaves around the blocks.

15 Minute Fall Candles

Done!  Yep, it took me LESS than 15 minutes.

15 Minute Fall Candles

You can do it too!