How to Use Cricut Design Space
This post contains affiliate links.
Last week I told you about my new Cricut Explore Air™ 2 . I hope you caught the bug and decided to try one for yourself! I promise I will keep giving you tips so you’re not alone in learning how to use it.
Now, while it’s a great machine and the Cricut Design Space™ is amazing, there is a learning curve in the beginning. Be patient and remember that you will find your groove. It was all new to me until I sat down with it last summer and I figured it out. If I can do it anyone can!!!
Over the past few months I have had several friends get a Cricut because of my recommendation and then they needed a little help getting started. I had them over to my house, went through how to begin and off they went. Since I can’t have you all over, I’ll be doing a series of posts and videos about how to use the Cricut. Woohoo! I’m super excited about this!
So here’s my very best tip: START SIMPLE!
Believe me, one of my friends didn’t listen and she almost lost her mind trying to do a project she wasn’t ready for. You develop an understanding of how things work as you make simple, pre-designed projects. With each time you get better and you advance.
I promise it’s not hard, but you do need to figure out the basics first.
Last summer when I opened up Design Space for the first time and started using it, I had to Google and YouTube everything. I finally realized I needed to slow down and do some basic designs and see how it all worked. Now, only 7 months later I don’t have to do that anymore. I can sit down and make advanced ideas. So see? It’s quick to learn!
Start simple by choosing a design already created for you in Cricut Design Space™. Let’s go through making a simple project step by step…..
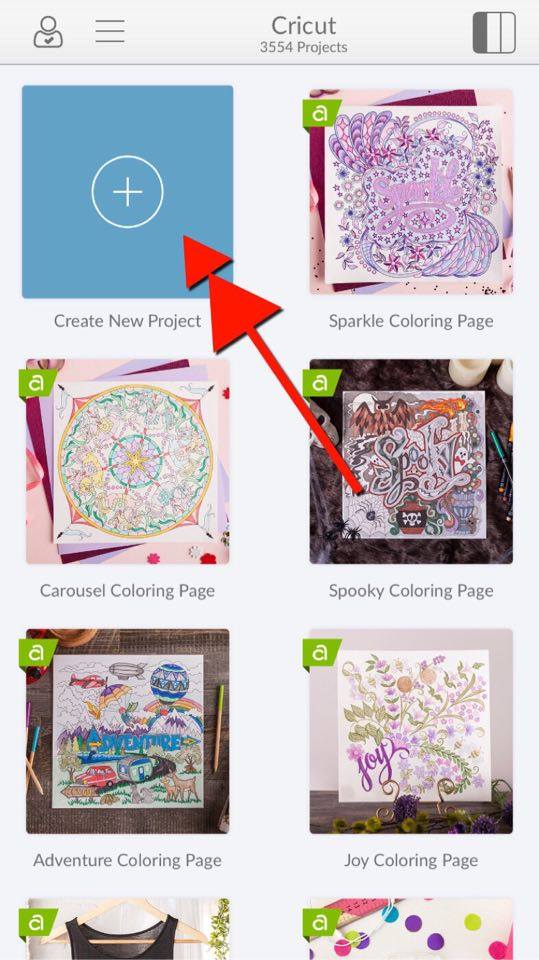
- Open your Cricut Design Space (in this tutorial I am using the app but you can also do this on your computer!). When you open it this is what you’ll see. Click on the square that says, “Create New Project.”
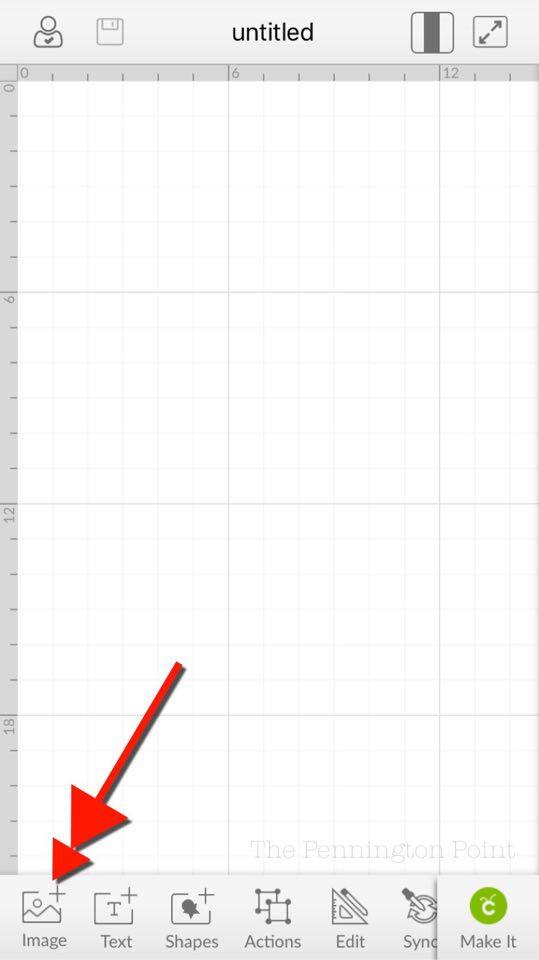
- You’ll find yourself here….in the design area where the magic happens. To find the project you want to make, click on the “Image” option at the bottom of the screen.
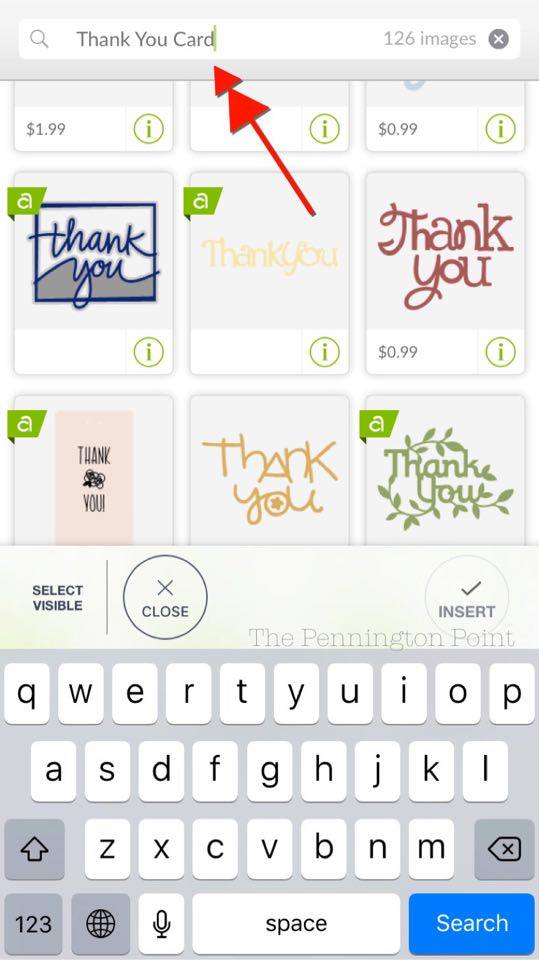
- That will lead you here. Click on the box at the top and type in what you want to make. I needed to make some thank you notes for all of the people who helped me at the wedding last weekend. So I typed in, “Thank you card.” Try different words to see what you find.
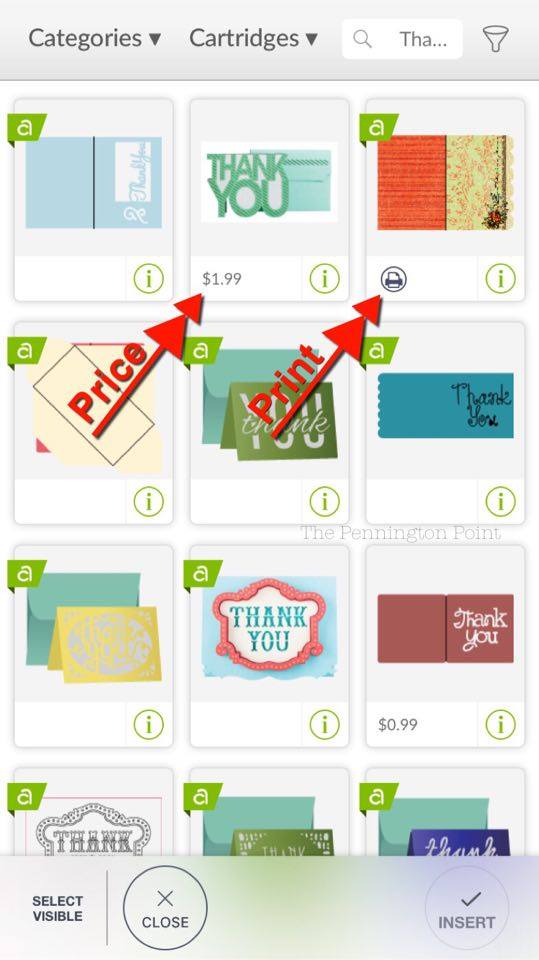
- The images may be different on your screen than what you see in my pictures since they change often. Cricut is great about constantly giving us new project ideas in their Project Center! Sometimes they’re free, sometimes they cost a little. Some of them are for printing, some for cutting. It’s easy to tell, just look for the price below the image or the little printer in a circle. Remember, we are starting simple, so don’t choose a printer option for this one.
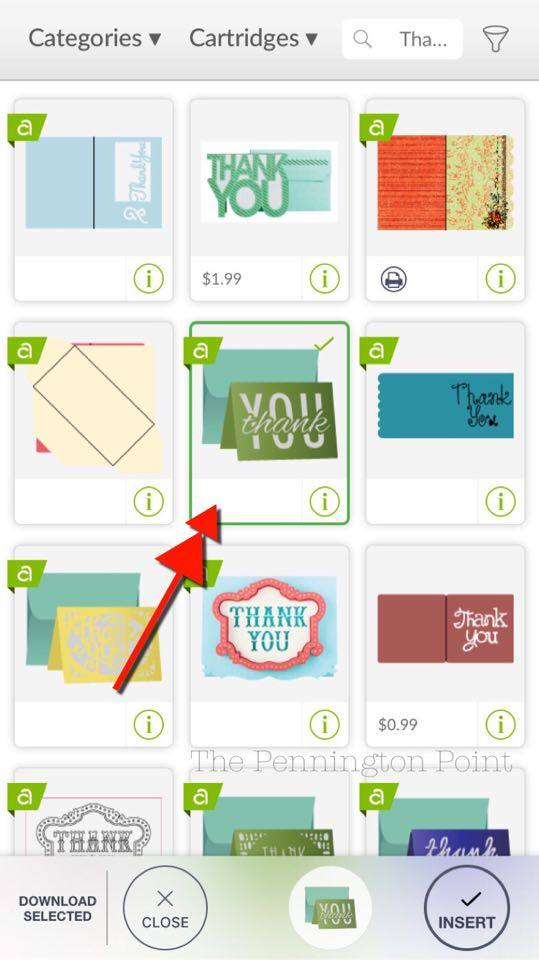
- I decided to choose a simple card that doesn’t need printing or cost anything. I have a subscription called Cricut Access Standard, which gives me a lot of great options. If you think you’ll be using your machine a lot (and I hope you will!) you should consider subscribing. When I buy something it charges my iTunes account. Easy peasy!Once you choose your project, click the “insert” button at the bottom of the screen.
- Now your project is in the work space. Here’s where you can make changes if you want. For your first project, I would suggest not making big changes. As you practice you’ll learn more and more about tweaking and adding your own flair.
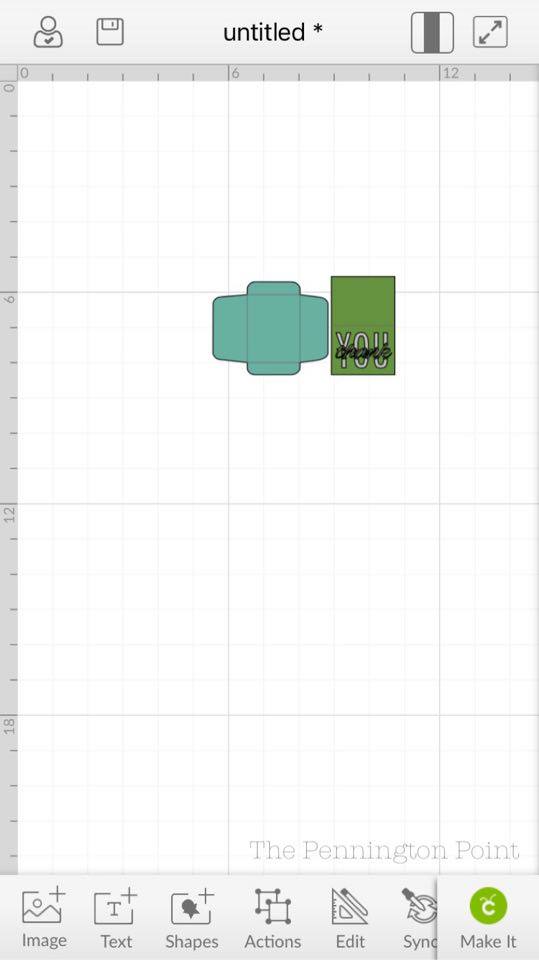
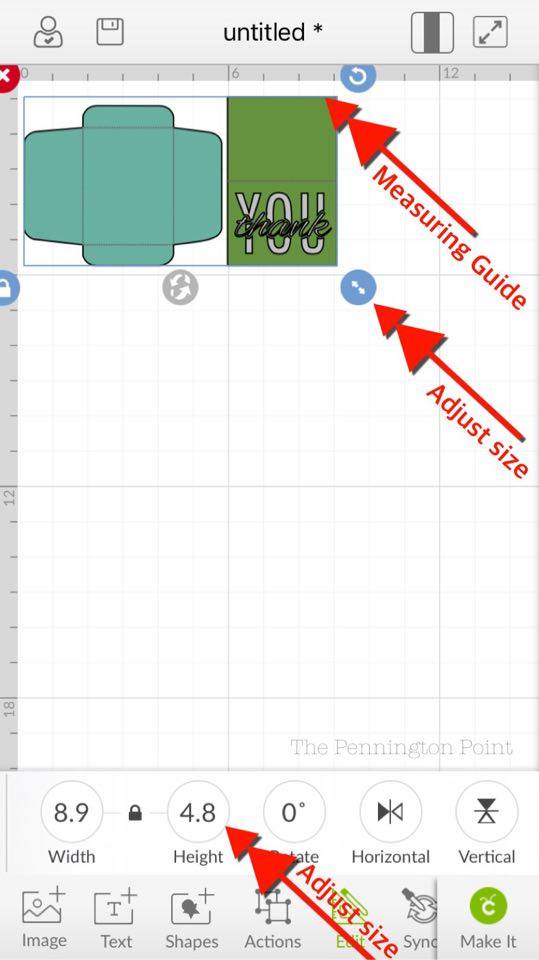
- In this case, the card design is really small so I decided to make it a little bigger. This one comes with an envelope to make with it, so I didn’t have to worry about making it to fit an envelope. The card, according to the measuring grid in the work space, is only about 2″ wide. I wanted to double that.You can either drag it to the size you want by pulling on the arrowed circle, or click on the “edit” option at the bottom of the screen and use the “width” or “height” selection (but remember in this case it’s measuring the entire thing, envelope and all, so I just dragged it and looked at the guide to see how big my card was).
- Once you have the size you want, you are ready to start cutting. Click the “Make It” green circle at the lower right of the screen.

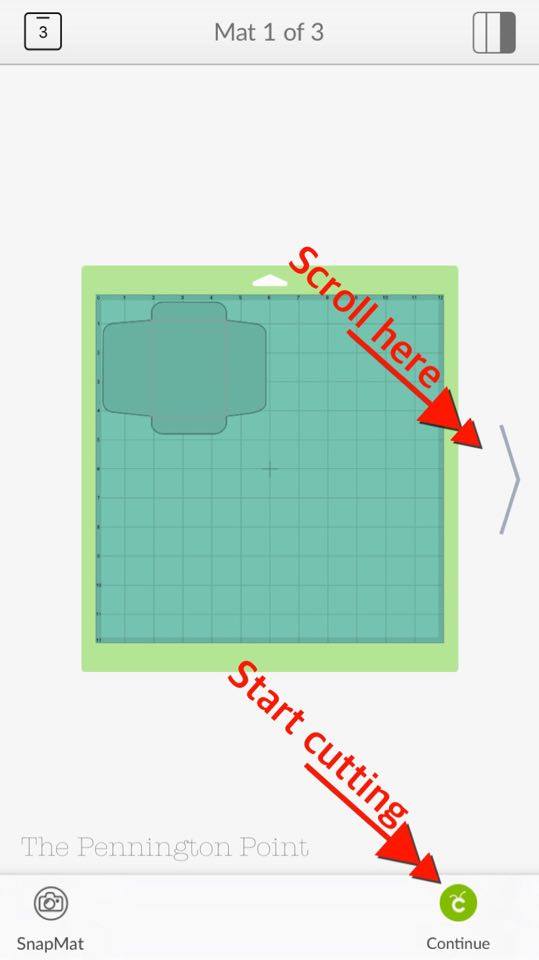
- Now you’re in the area where your project shows on the cutting mats. You can click the arrow to the right and scroll through to see each mat that you will be using. I like to look through them and get my paper or vinyl ready in the order they will be cut. Then scroll it back to the beginning and click on the “continue” green circle.
- Now you’re ready to roll. I could tell from scrolling that the first mat will cut the envelope, so I got that ready. Remember, you’re not married to the colors in the design. I used different colored papers. Just whatever I had around.

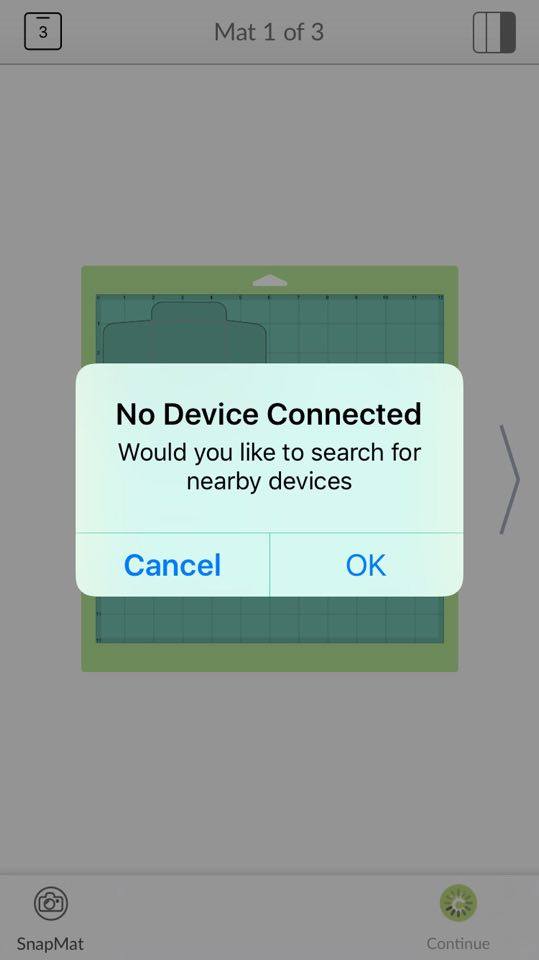
- The Design Space will guide you, so just follow the instructions as they pop up. Each time you start it will ask you to connect with a nearby device. This is normal.
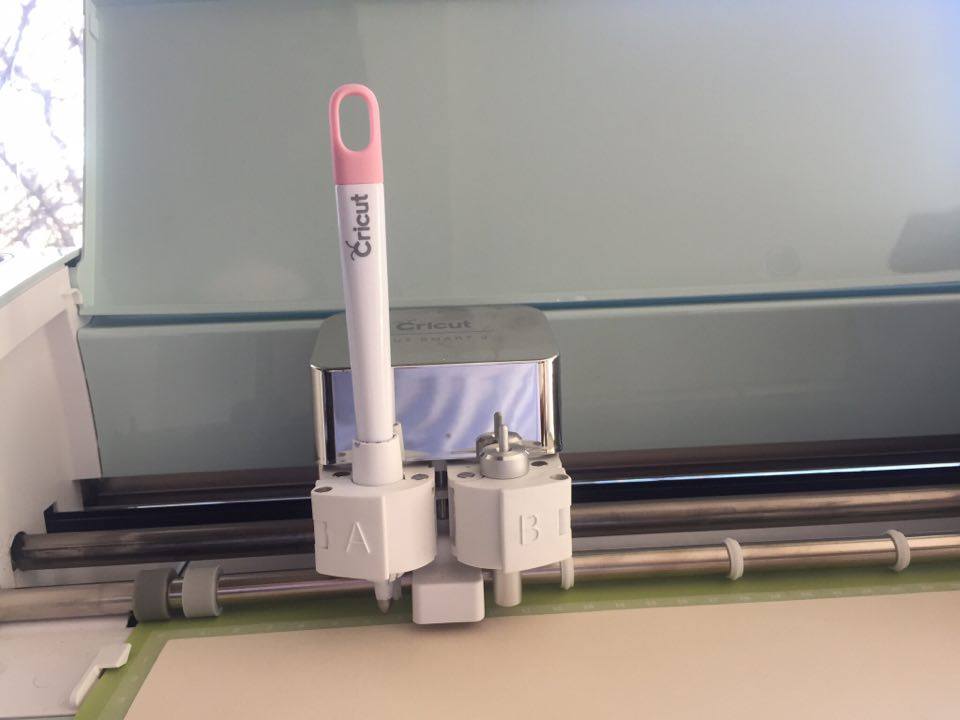
- The project I chose uses the scoring stylus. I love that it has your back so you don’t miss anything.

- Make sure the stylus is all the way in. It should click when it’s down. Then close the latch and it’s all ready!
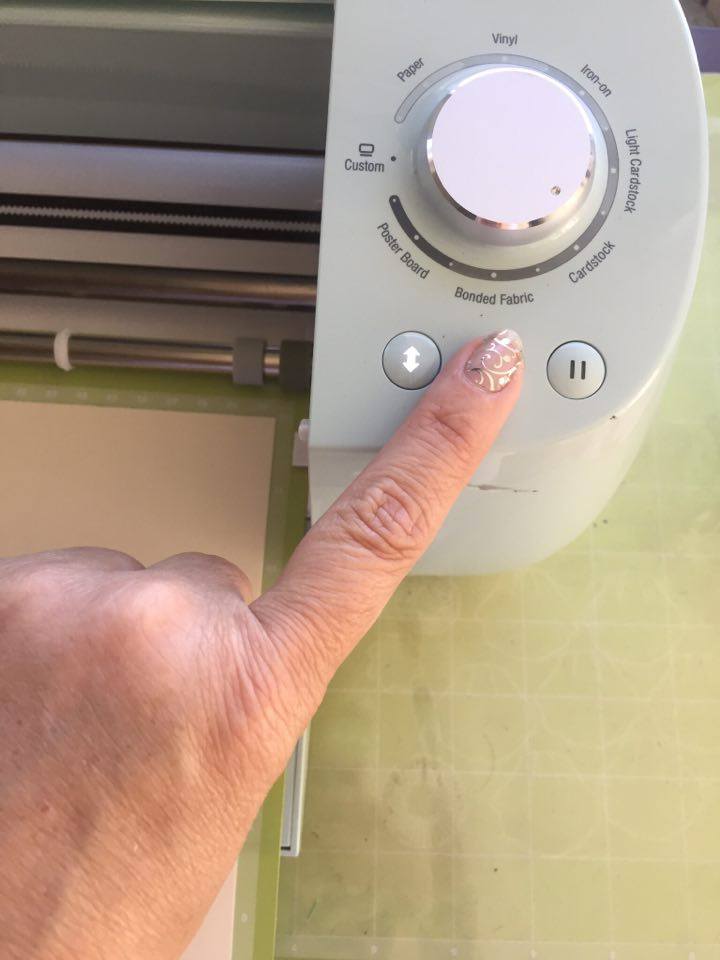
- Now press the flashing buttons on the machine. The first one is for loading, and the second starts the scoring and cutting. While we’re at it, be sure the dial is set on the material you’re using.
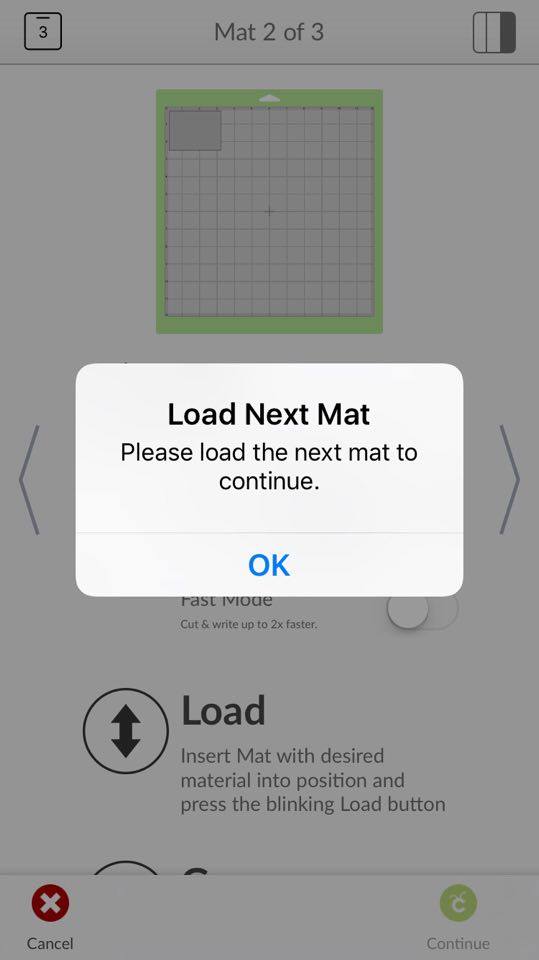
- Just keep following the prompts. It will tell you when you load and unload.
- I love watching the machine cut my design. It amazes me every time!

- And after removing it from the mat and folding on the score lines, I had the cutest little thank you card you ever saw!
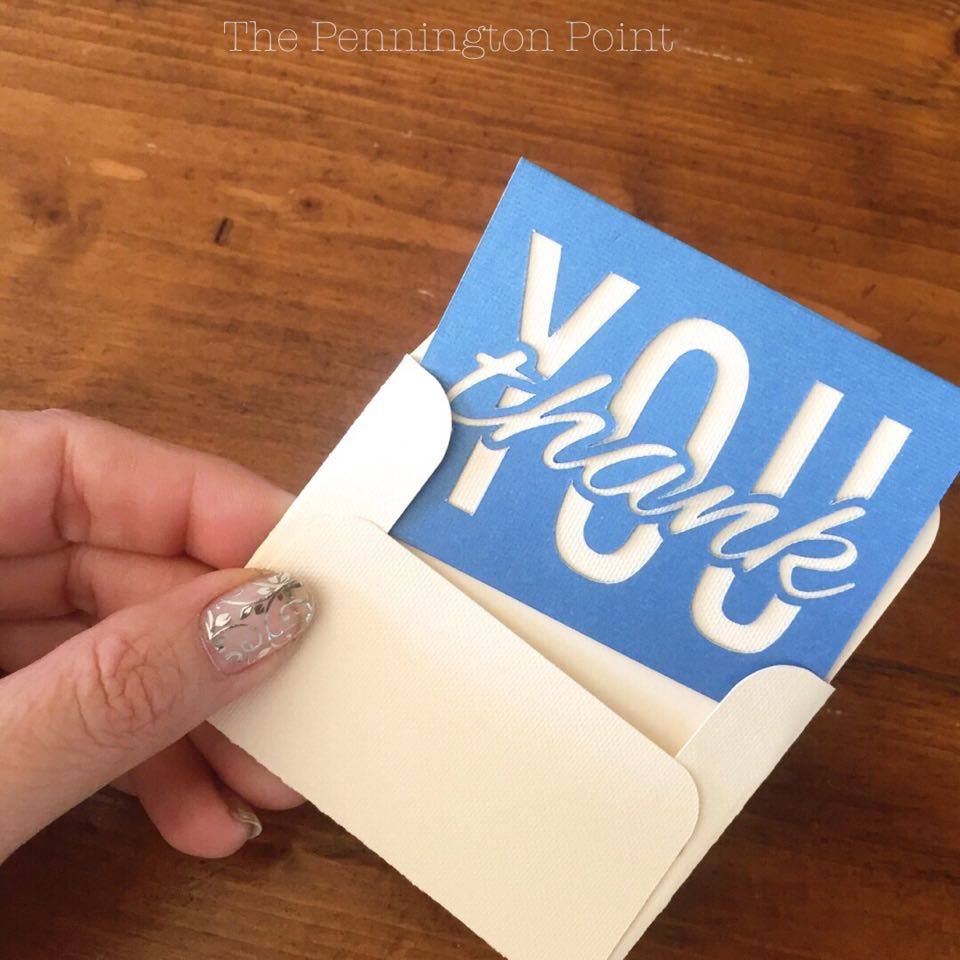
- A glue dot in each corner of the little backing piece and envelope flaps and it’s ready to use!

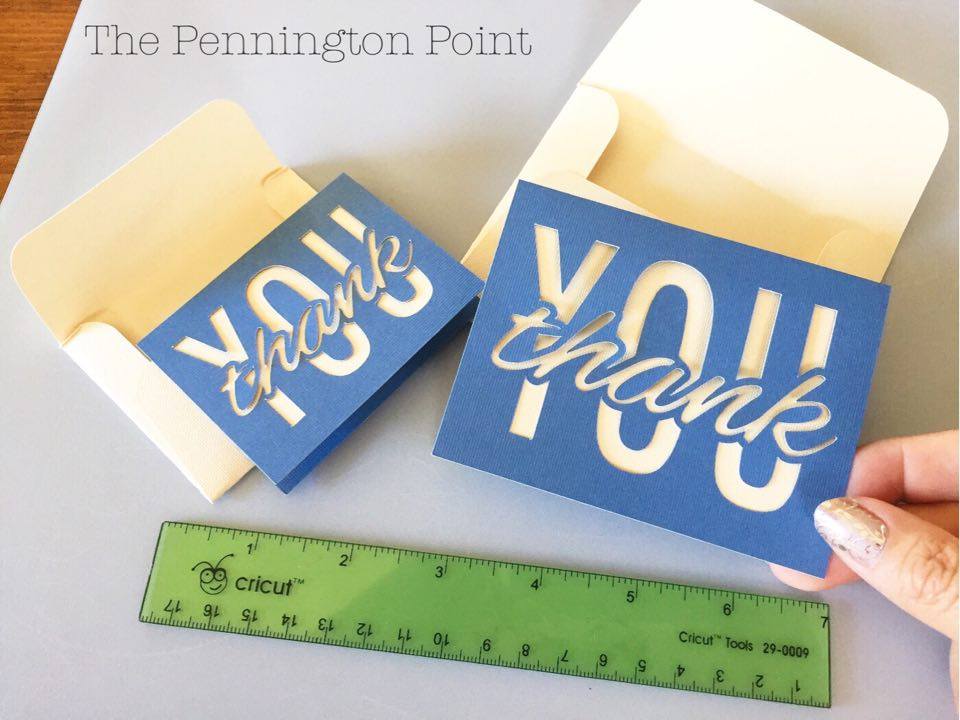
- I decided to make another one a little bigger. I like the small one too. I made a few of each. It all took me about half an hour and I had cards and envelopes ready to send in gratitude to all my wedding helpers.
Now it’s your turn. You can do this! Starting with something simple will get you used to the Design Space and how it works. There are so many gorgeous ideas already put together for you that you will love. Feel free to ask me any questions and I’ll be doing some YouTube videos to expand your knowledge of how to use it.
Next week I’ll be showing you an original design of mine! It’s a little bit advanced, but with some practice you can do it too! Remember that I just started using Design Studio last summer!
You got this! {fist bump}
If you liked this, check out my other posts about using the Cricut:
Cricut Explore Air 2 Has Joined the Family!
5 Ways to Use the Cricut for a Wedding or Party
Here’s a Cricut Design Space Video that walks you through.
This is a sponsored conversation written by me on behalf of Cricut. The opinions and text are all mine.